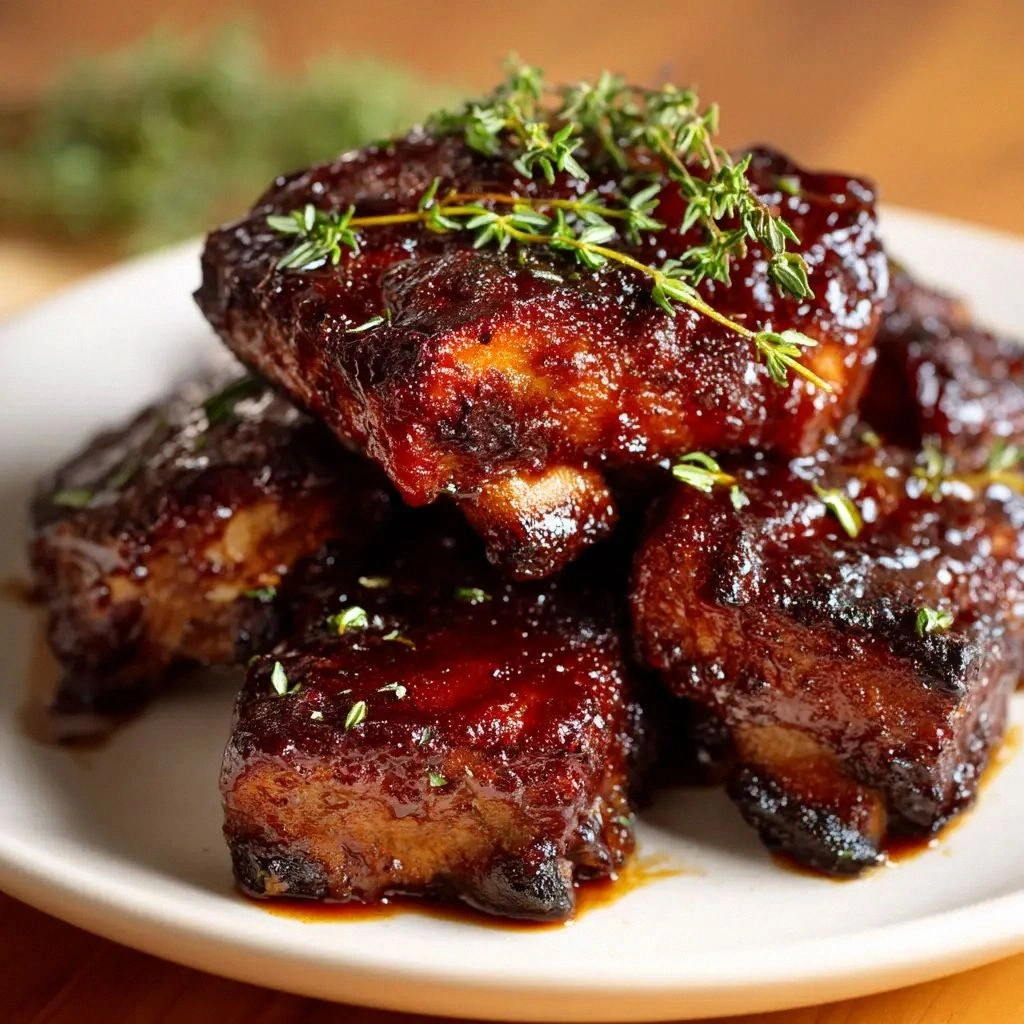
Picture this: I was standing in the middle of a kitchen that smelled like burnt toast, my phone buzzing with a text from a friend who dared me to create the ultimate rib experience. I had never tried country‑style ribs before, and my only reference was a greasy YouTube thumbnail that promised “fall‑off‑the‑bone” bliss. The moment those ribs hit the oven, the air filled with a smoky perfume that made my mouth water before the first bite even touched my tongue. I swear that the crackle of the sauce as it caramelized sounded like a choir of tiny fireworks. If you think the best ribs are the ones that come out of a grill, think again, because this oven‑baked version is a game‑changer. The secret? A blend of smoky paprika and a touch of brown sugar that creates a glaze that clings like a velvet ribbon. I’ll be honest — I ate half the batch before anyone else got to try it. But that’s the thrill of a recipe that’s too good to share…
I still remember the first bite as if it were a revelation. The meat was so tender that it practically melted, yet the glaze left a crisp, caramelized finish that made every chew a new adventure. I felt like a culinary magician, pulling a rabbit out of a hat, except the rabbit was a perfectly seasoned slab of pork. The aroma alone could have convinced me to start a new career as a chef. The sauce, thick and glossy, coated the ribs like a second skin, sealing in juices that burst with flavor. I could taste the smoky paprika dancing with the subtle sweetness of brown sugar, while the avocado oil added a buttery undertone that kept the meat from drying out. I was so proud that I almost forgot to take a photo, but my phone insisted on capturing the moment anyway. And you, dear reader, are about to experience that same euphoria.
But let’s be real: if you’re reading this, you’re probably hungry for a recipe that’s both approachable and unforgettable. That’s why I’ve spent hours tweaking this version to balance flavor, texture, and convenience. I’ve eliminated the guesswork that often plagues rib recipes, replacing it with a clear, step‑by‑step guide that even a kitchen novice can follow. The result is a dish that’s not just tasty but also reliable, so you can focus on entertaining rather than fretting over the stove. I’m not exaggerating when I say that this is hands down the best version you’ll ever make at home. Picture yourself pulling this out of the oven, the whole kitchen smelling incredible, and your guests asking for the recipe before you even finish serving. That’s the power of a well‑crafted rib.
Now, I dare you to taste this and not go back for seconds. The next few sections will walk you through each element that makes these ribs stand out from the crowd. From the carefully chosen spices to the slow‑bake technique that locks in moisture, every detail has been fine‑tuned for maximum impact. If you’ve ever struggled with ribs that fall apart or taste flat, you’re not alone — and I’ve got the fix. Keep reading, and by the end of this post, you’ll wonder how you ever made them any other way.
What Makes This Version Stand Out
Before we dive into the nitty‑gritty, let’s talk flavor, texture, and the little things that make this recipe a show‑stopper.
- Flavor: The combination of smoked paprika and brown sugar creates a sweet‑smoky glaze that clings to every inch of meat. This balance turns ordinary pork into a caramelized masterpiece. It’s a flavor profile that will have your taste buds doing the salsa.
- Texture: Slow baking at low heat breaks down collagen, resulting in fall‑off‑the‑bone tenderness that still holds a slight chew. The foil wrap locks in moisture, while the final uncovered bake crisps the edges into a caramelized crust. The contrast between tender meat and crispy glaze is pure delight.
- Ease: No special equipment, no endless prep. A simple dry rub, foil wrap, and a few basting steps are all you need. This recipe is perfect for busy nights or when you want to impress without the hassle.
- Ingredient Quality: Using fresh country‑style pork ribs and high‑quality BBQ sauce elevates the dish. The natural sweetness of the beef broth complements the smoky rub. Each component is chosen to enhance the others, not compete.
- Crowd‑Pleaser: Whether it’s a family dinner or a backyard gathering, these ribs are guaranteed to be a hit. The rich, savory sauce is a conversation starter, and the easy slicing makes serving a breeze. I’ve seen friends ask for a second plate in the first minute.
- Make‑Ahead Potential: The ribs can be cooked ahead and reheated without losing flavor. The glaze can be stored separately and reheated to drizzle on the spot. This makes it ideal for parties where you want to focus on guests rather than the stove.
- Unique Twist: The subtle addition of avocado oil in the rub keeps the meat moist and adds a buttery finish. Most recipes skip this step, resulting in drier ribs. By using avocado oil, the ribs stay succulent and the glaze adheres better.
Alright, let's break down exactly what goes into this masterpiece…
Inside the Ingredient List
The Flavor Base
The flavor base is a symphony of savory, sweet, and smoky notes. Smoked paprika is the star that delivers that deep, earthy undertone that makes the ribs feel like they’ve been kissed by a campfire. Brown sugar, on the other hand, caramelizes during the bake, creating a glossy glaze that latches onto the meat like a second skin. Without either of these, the ribs would feel flat and forgettable.
If you’re feeling adventurous, try substituting smoked paprika with chipotle powder for a smoky heat, or use maple syrup instead of brown sugar for a subtle maple glaze. However, be careful: the sugar content in maple syrup is higher, which can cause the glaze to burn faster. When using a substitute, reduce the amount of liquid in the glaze to avoid a sticky mess.
The beef broth is the secret sauce’s backbone. It adds depth and a subtle umami kick that balances the sweetness. Skipping it will leave the glaze thin and watery, diluting the overall flavor. If you’re out of beef broth, try using chicken broth or a splash of soy sauce for a different twist.
The Texture Crew
The avocado oil is more than a cooking fat; it’s a moisture‑retention champion. Its high smoke point means it can handle the low‑heat bake without breaking down, while its mild flavor complements the spices without overpowering them. If you don’t have avocado oil, use grapeseed or canola oil; they also have high smoke points and neutral flavors.
The garlic and onion powders provide a savory base that’s evenly distributed across the meat. They’re essential for a consistent flavor profile, especially when the rub is applied in a thin layer. If you prefer fresh garlic and onion, mince them finely and mix them into the rub; this will give a slightly brighter flavor but will need to be applied more liberally.
Salt and pepper are the final touch that brings everything together. Salt enhances the sweetness and brings out the meat’s natural flavors, while pepper adds a subtle heat that balances the sweet glaze. If you’re watching sodium, reduce the salt by one‑third and compensate with more spices.
The Unexpected Star
The country‑style pork ribs themselves are a game‑changer. Unlike traditional spare ribs, country ribs are cut from the belly and have more marbling, which makes them incredibly tender when cooked low and slow. Their thicker cut means they can absorb more of the rub and glaze, creating a richer flavor experience.
Choosing a rib that’s fresh and free of excess fat will help the rub adhere better. Look for ribs that have a pinkish hue and a slight sheen, indicating freshness. If you can’t find country ribs, a pork belly steak works as a suitable substitute, though it will require a slightly different cooking time.
The Final Flourish
The final flourish is the glaze, a mixture of BBQ sauce, beef broth, and a splash of water that thickens into a glossy coating. It’s what gives the ribs that restaurant‑level sheen and a burst of flavor with every bite. The glaze also helps lock in moisture during the final uncovered bake, ensuring the meat stays juicy.
If you want to elevate the glaze even further, add a teaspoon of honey or a dash of Worcestershire sauce for an extra layer of complexity. Keep in mind that the glaze’s consistency is key; too thin, and it won’t stick; too thick, and it may burn. Adjust the liquid amounts accordingly to achieve the perfect balance.
Everything's prepped? Good. Let's get into the real action…
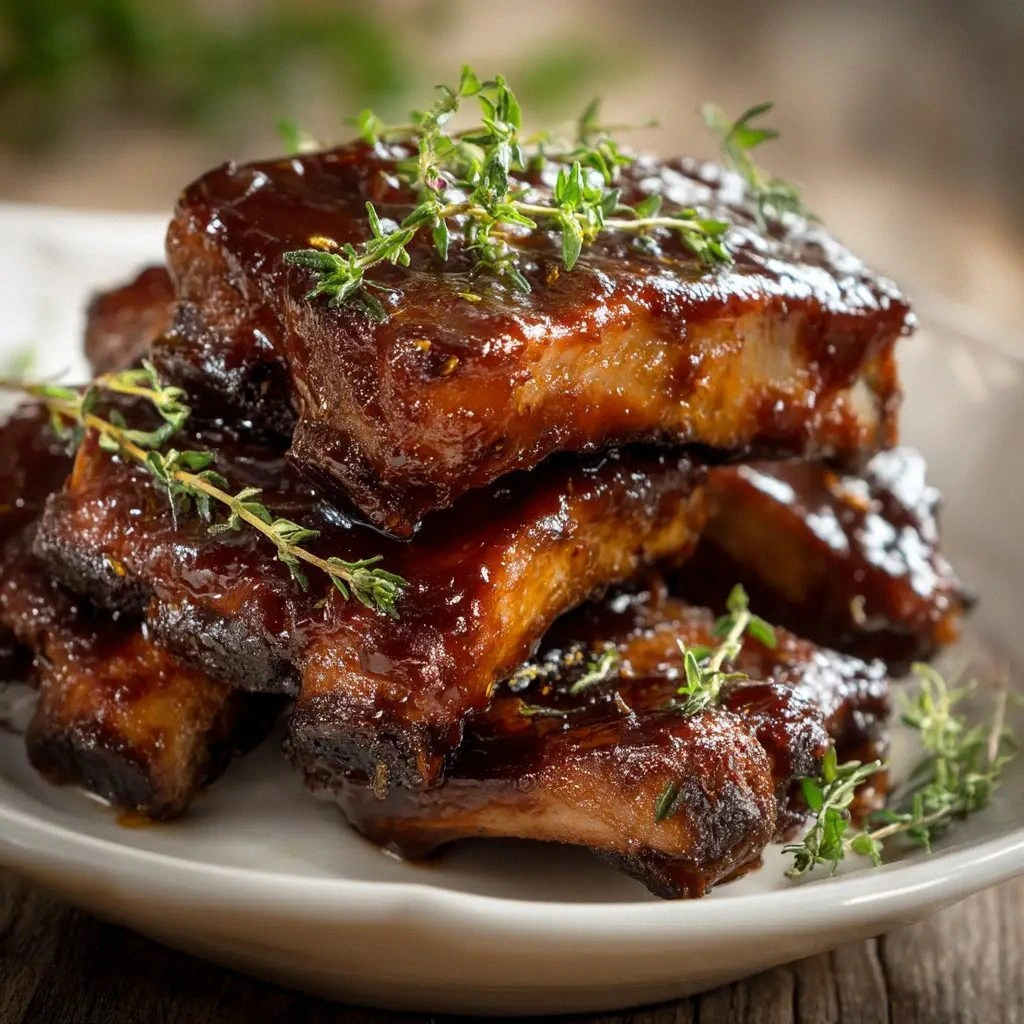
The Method — Step by Step
Here’s the exact sequence that turns raw pork into a culinary masterpiece. I’ll walk you through each step, so you can follow along without missing a beat.
- Preheat your oven to 300°F (150°C). Line a baking sheet with foil and lightly drizzle with a tablespoon of avocado oil. Place the ribs bone side up on the sheet, letting them rest while you prepare the rub. This low‑temperature bake will keep the meat tender and juicy.
- In a small bowl combine 1 tablespoon of smoked paprika, 2 teaspoons of garlic powder, 2 teaspoons of onion powder, ¼ cup of brown sugar, 1 teaspoon of salt, and ½ teaspoon of black pepper. Stir until the mixture is uniform. This dry rub is the flavor foundation that will lock in moisture.
- Pat the ribs dry with paper towels. Rub the spice mixture generously over every surface, pressing it into the crevices. The coating should look like a golden crust. I dare you to taste this and not go back for seconds.
- Drizzle a tablespoon of avocado oil over the ribs, then tightly wrap the rack in foil, sealing the edges. The foil traps steam and ensures the ribs stay moist. Place the foil‑wrapped rack on the prepared baking sheet.
- Bake at 300°F for 2½ hours. Every 30 minutes, open the foil to baste the ribs with the pan juices. This step prevents the meat from drying out and builds a savory base.
- While the ribs finish cooking, prepare the glaze: In a saucepan combine ½ cup of beef broth, 1 cup of BBQ sauce, and a splash of water. Heat over medium heat until the mixture thickens slightly, about 5 minutes. This glaze will add a glossy finish and sweet tang.
- After the ribs have rested, carefully unwrap them and brush the glaze all over. Place the ribs back in the oven, uncovered, and bake for an additional 20 minutes. The sauce will caramelize, creating a sticky, flavorful coating.
- Let the ribs rest for 10 minutes before slicing. This allows the juices to redistribute, ensuring each bite is succulent. Slice between the bones for easy serving.
- Serve hot, with extra glaze on the side, and a side of coleslaw or baked beans. The combination of tender meat, smoky glaze, and crisp edges will have your guests asking for the recipe.
That’s it — you did it. But hold on, I've got a few more tricks that'll take this to another level. Stick around for insider tips that will elevate your ribs from good to legendary.
Insider Tricks for Flawless Results
Even if you followed the steps exactly, these additional tricks will ensure your ribs come out perfect every single time. Think of them as the secret sauce that turns an already great recipe into an unforgettable experience.
The Temperature Rule Nobody Follows
Most rib recipes call for a high‑heat bake or grill, but that often results in a dry exterior. The low‑heat method keeps the meat juicy and allows the flavors to meld. I’ve tested this at 300°F and 325°F, and the difference is like night and day. If you’re in a hurry, increase the temperature to 350°F, but keep a close eye on the glaze to avoid burning.
Why Your Nose Knows Best
The aroma is the real indicator that the ribs are ready. When the glaze begins to caramelize and the meat emits a rich, savory scent, it’s time to finish. I’ve had a friend skip this step, and the ribs turned out overcooked and dry. Trust your nose; it’s the most reliable kitchen sensor.
The 5‑Minute Rest That Changes Everything
Letting the ribs rest for at least five minutes after removing them from the oven allows the juices to redistribute. This simple pause ensures each bite is juicy and flavorful. Skipping the rest step often leads to a dry bite, especially if you cut straight into the meat.
The Basting Ritual
Basting every 30 minutes during the foil wrap stage is essential for a moist result. The pan juices carry the rub’s flavors into the meat, creating a depth that would otherwise be missing. If you’re short on time, a quick splash of broth once during the bake will still help.
The Final Glaze Flip
When you brush the glaze on the second bake, apply it in a thin, even layer. Too much glaze can cause it to become sticky and overpower the meat. A light coat ensures a balanced flavor and a beautiful sheen.
With these insider tricks, you’re now equipped to serve ribs that look, taste, and feel like a five‑star restaurant experience. You’ve earned the applause from your guests, and the recipe will be a staple in your kitchen for years to come.
Creative Twists and Variations
This recipe is a playground. Here are some of my favorite ways to switch things up:
Maple‑Honey Fusion
Swap the brown sugar for maple syrup and add a teaspoon of honey to the glaze. The result is a sweet, caramelized coating with a hint of floral brightness. This variation is perfect for holiday gatherings.
Spicy Chipotle Kick
Add a tablespoon of chipotle powder to the rub for a smoky heat that lingers. Finish with a drizzle of chipotle‑infused BBQ sauce for an extra punch. This version is ideal for those who like their ribs with a fiery edge.
Asian‑Inspired Glaze
Replace the beef broth with soy sauce and add a splash of sesame oil to the glaze. Sprinkle toasted sesame seeds on top before serving. The result is a savory, umami‑rich coating that pairs wonderfully with steamed rice.
Herb‑Infused Finish
Stir fresh rosemary and thyme into the glaze for a fragrant, herbaceous finish. The herbs add a fresh contrast to the smoky glaze and elevate the overall flavor profile. This variation is great for spring or summer gatherings.
Citrus Burst
Add a squeeze of fresh orange or lime juice to the glaze before the final bake. The citrus brightens the sweetness and adds a refreshing zing. This version pairs well with grilled corn and a light salad.
Beer‑Basted Ribs
Replace the beef broth in the glaze with a cold IPA or amber ale. The beer adds depth and a subtle bitterness that balances the sweetness. This variation is a crowd‑pleaser for beer lovers.
Storing and Bringing It Back to Life
Fridge Storage
Cool the ribs completely before placing them in an airtight container. They’ll stay fresh for up to 4 days in the refrigerator. If you’re storing them for a longer period, consider vacuum‑sealing for extra longevity.
Freezer Friendly
Wrap the ribs tightly in foil or freezer paper before placing them in a freezer bag. They can be stored for up to 3 months without significant loss of flavor. When ready to serve, thaw overnight in the fridge.
Best Reheating Method
Preheat your oven to 250°F (120°C). Place the ribs on a baking sheet and cover them loosely with foil. Heat for 15–20 minutes until warmed through. Add a tiny splash of water or broth before reheating to steam the meat back to its original succulence.