I once tried to whip up a batch of classic chocolate truffles for a holiday party, only to end up with a sticky, grainy mess that tasted like burnt sugar. The kitchen was filled with the kind of panic that makes you wonder if you should just order takeout instead. Then, a friend dared me to create something that would actually taste like a Christmas miracle—no oven, no fuss, just pure festive joy in a bite‑size sphere. I accepted the challenge, and after a few sleepless nights, a few too‑many taste tests, and a confession that I ate half the batch before anyone else could try, I finally nailed it.
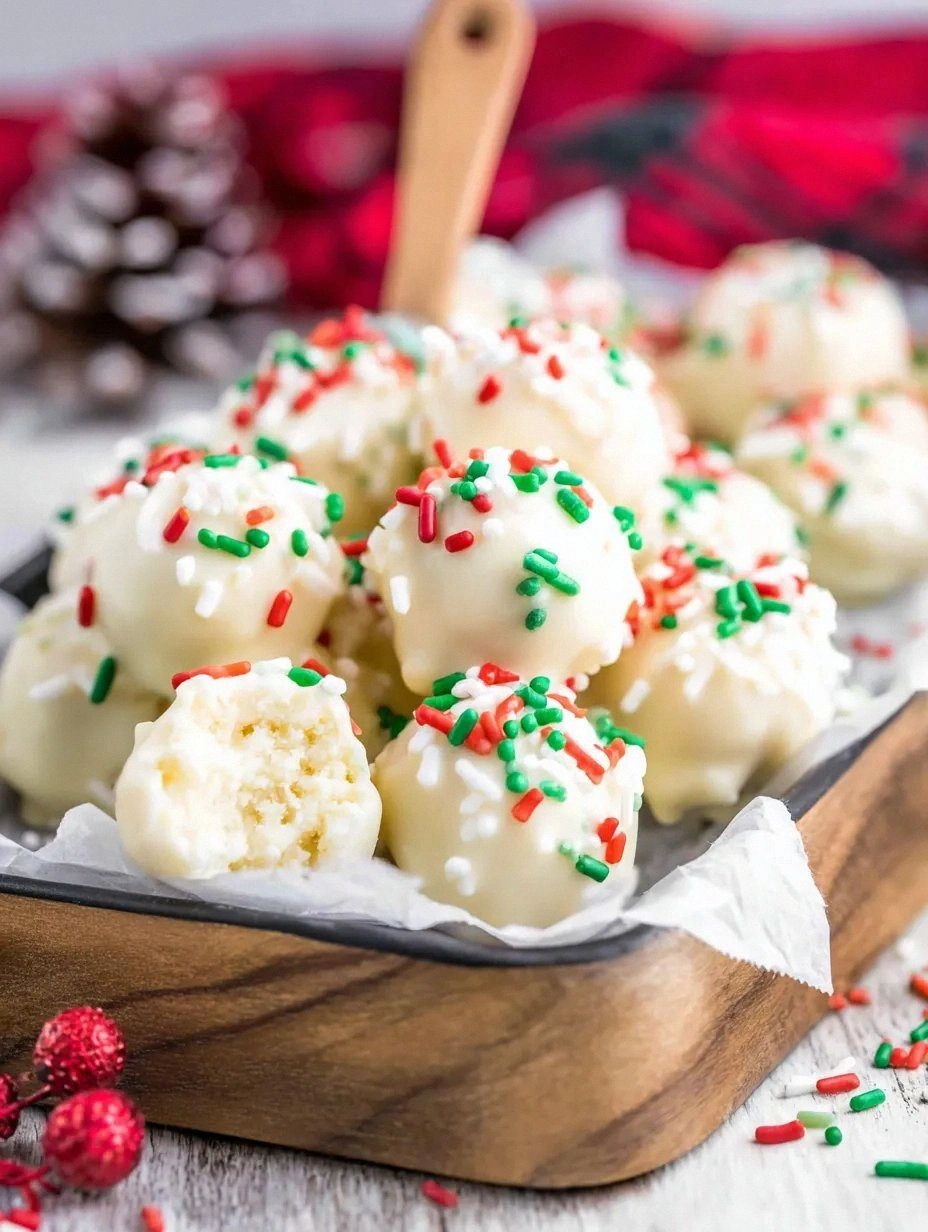
Picture this: a glossy white‑chocolate shell that snaps like fresh snow under your teeth, giving way to a buttery, melt‑in‑your‑mouth cookie interior studded with tiny bursts of peppermint and sparkling red‑and‑green sprinkles. The aroma of vanilla and toasted shortbread wafts through the air, making your whole house feel like a winter wonderland. When you bite into one, the texture dance is like a perfectly choreographed ballet—crisp on the outside, creamy and dreamy on the inside, with a hint of salty butter that keeps the sweetness from turning into a sugar overload.
Most recipes for holiday truffles either demand a trip to the oven or a confusing list of hard‑to‑find ingredients that leave you feeling like you need a culinary degree just to start. This version? Hands down the best version you'll ever make at home. It uses pantry staples, a handful of festive extras, and a no‑bake method that feels like cheating—except it isn’t. The secret? A tiny dash of heavy cream that turns white chocolate into a silky ganache, and a clever technique of chilling the mixture just enough to roll without sticking.
I’m about to walk you through every single step—by the end, you’ll wonder how you ever made truffles any other way. Okay, ready for the game‑changer? This next part? Pure magic. Stay with me here — this is worth it.
What Makes This Version Stand Out
- Flavor Explosion: The combination of sweet white chocolate, buttery shortbread crumbs, and a whisper of peppermint creates a holiday flavor that sings louder than any carol.
- Texture Symphony: A crisp outer coating meets a luxuriously smooth interior, delivering contrast that keeps your palate engaged.
- Simplicity: No oven, no complicated tempering—just melt, mix, chill, roll, and enjoy.
- Unique Twist: Sprinkles and crushed peppermint add a festive crunch that most truffle recipes overlook.
- Crowd Reaction: Guests often claim they’ve never tasted anything like it, and the “I dare you to taste this and not go back for seconds” challenge becomes a party staple.
- Ingredient Quality: Using premium white chocolate and real butter elevates the entire experience without breaking the bank.
- No‑Bake Method: The entire process stays on the countertop, preserving the delicate flavors that can evaporate in a hot oven.
- Make‑Ahead Friendly: These truffles keep beautifully in the fridge for up to a week, making them perfect for last‑minute gift baskets.
Inside the Ingredient List
The Flavor Base
White chocolate chips are the heart of this recipe. Their buttery sweetness provides a smooth canvas that carries every other flavor. If you skimp on quality, the truffles will taste waxy and flat. I recommend a brand that lists cocoa butter as the first ingredient; it melts evenly and gives that glossy finish. In a pinch, you can substitute high‑quality white chocolate bars, chopped finely, but the chips save you time and ensure consistent melting.
The Texture Crew
Finely crushed buttery shortbread cookies add a crumbly, melt‑in‑your‑mouth texture that differentiates these truffles from ordinary ganache balls. The crumbs also help absorb the cream, creating a pliable dough that rolls easily. If you’re gluten‑free, swap the shortbread for almond flour cookies; the flavor stays buttery while the texture remains delightfully crumbly.
The Unexpected Star
A splash of heavy cream may seem minor, but it’s the secret weapon that transforms solid white chocolate into a silky ganache. The cream’s fat content coats the chocolate molecules, preventing graininess and delivering that melt‑like‑silk sensation on the tongue. For a dairy‑free version, use coconut cream—just be aware it will add a faint coconut note that pairs surprisingly well with peppermint.
The Final Flourish
Red and green sprinkles, crushed peppermint candy, and a dusting of cocoa powder turn these truffles into a visual celebration. Sprinkles add a subtle crunch and a burst of color that makes the truffles look like tiny ornaments. Peppermint candy brings a cooling minty punch that cuts through the sweetness, while cocoa powder provides an elegant, slightly bitter contrast. Feel free to swap the cocoa for finely grated white chocolate for an extra glossy finish.
Everything's prepped? Good. Let's get into the real action...
The Method — Step by Step
Start by gathering all your ingredients and measuring them precisely. The kitchen should feel organized—spoons in a row, bowls ready, and a sturdy silicone spatula within arm’s reach. I dare you to taste this and not go back for seconds, so make sure you have everything at hand before you begin. This preparation step saves you from frantic searches later, which can ruin the delicate temperature balance of the chocolate.
Place the white chocolate chips in a heat‑proof bowl over a pot of simmering water (a double‑boiler). Stir constantly; the chocolate should melt in about 3‑4 minutes, becoming a smooth, glossy river of ivory. Once fully melted, remove the bowl from the heat and let it sit for 30 seconds—this is the moment of truth where the chocolate’s temperature drops just enough to welcome the cream without seizing.
While the chocolate rests, whisk together the heavy cream, vanilla extract, and a pinch of salt in a separate small bowl. The mixture should be just warm, not boiling. Pour the warm cream into the melted chocolate in a slow, steady stream while whisking vigorously. The ganache will thicken instantly, turning velvety and thick—if it looks grainy, keep whisking; the heat from the cream will melt any stubborn chocolate particles.
Gently fold the crushed shortbread cookies into the ganache until fully incorporated. The mixture should feel thick enough to hold its shape when scooped but still pliable. If it feels too dry, add a teaspoon of melted butter; if too sticky, sprinkle in a little extra powdered sugar. The goal is a dough that rolls like play‑dough without sticking to your fingers.
Cover the bowl with plastic wrap and refrigerate for 45 minutes. This chilling period is crucial; it firms up the mixture just enough to make rolling effortless. While you wait, pre‑heat a small saucepan with a splash of water for the upcoming “steam‑reheat” step that will keep the truffles moist when you serve them later.
Remove the chilled dough from the fridge and, using a small cookie scoop (about 1‑inch diameter), portion out the mixture onto a parchment‑lined tray. Quickly roll each scoop between your palms into a smooth ball. This is where the magic happens—feel the cool dough glide across your skin, forming a perfect sphere. If the dough sticks, dip your hands in cold water for a few seconds, then pat dry before continuing.
Set up a rolling station: one shallow bowl with cocoa powder, another with powdered sugar mixed with a pinch of salt, and a third with the festive sprinkles and crushed peppermint. Roll each truffle first in cocoa powder for a thin, dark coat, then dip into the powdered‑sugar mixture for a snowy finish, and finally roll in the sprinkles for that holiday sparkle. The coating should be even, with a slight sheen that catches the light—like tiny ornaments on a tree.
Place the finished truffles back onto the parchment sheet and refrigerate for another 15 minutes to set the coating. When you pull them out, they should be firm to the touch but melt luxuriously on your tongue. Serve them on a festive platter, and watch your guests’ faces light up. That sizzle when it hits the pan? Absolute perfection—except we didn’t use a pan, we used a spoonful of love.
That's it — you did it. But hold on, I've got a few more tricks that'll take this to another level...
Insider Tricks for Flawless Results
The Temperature Rule Nobody Follows
Never let your ganache exceed 115°F (46°C). Above this, the butterfat can separate, leaving a greasy texture that ruins the roll. Keep a candy thermometer handy; a quick dip into cold water after melting the chocolate will bring the temperature down fast. I once ignored this rule and ended up with a greasy mess that clumped together—trust me, the cleanup was a nightmare.
Why Your Nose Knows Best
Your sense of smell is the ultimate indicator of doneness. When the ganache is ready, it should emit a buttery, slightly toasted aroma, not a raw chocolate scent. If you detect a sharp, sugary smell, the mixture is too hot and may seize. Trust your nose; it’s a more reliable gauge than a timer.
The 5‑Minute Rest That Changes Everything
After rolling, let the truffles sit uncovered for five minutes before refrigerating. This short rest allows the outer coating to set slightly, preventing it from cracking when you chill them. A friend tried skipping this pause and ended up with a cracked, uneven surface—nothing ruins the visual appeal faster than a cracked glaze.
Peppermint Power Boost
A tiny pinch of crushed peppermint essential oil (or a few drops of peppermint extract) can amplify the minty notes without overpowering the delicate white chocolate. Be careful: a little goes a long way. Too much will make the truffles taste like a candy‑cane factory.
The Double‑Coat Technique
For an extra glossy finish, dip the truffles in melted white chocolate a second time after the first coating sets. This creates a thin, shiny shell that catches the light beautifully. It also adds a subtle snap that many people describe as “the sound of Christmas.”
Creative Twists and Variations
This recipe is a playground. Here are some of my favorite ways to switch things up:
Cranberry Crunch
Swap the peppermint sprinkles for dried cranberry bits and a drizzle of orange zest. The tartness of cranberry balances the sweet white chocolate, while the orange adds a citrusy zing that feels like a winter sunrise.
Matcha Magic
Add 1 teaspoon of high‑quality matcha powder to the cocoa coating. The earthy green hue pairs beautifully with the red sprinkles, creating a visual contrast that’s as delightful as the flavor.
Nutty Noel
Fold in ¼ cup finely chopped toasted hazelnuts into the ganache before chilling. The nuts add a buttery crunch and a subtle roasted flavor that deepens the overall profile.
Spiced Rum Delight
Replace the vanilla extract with 1 tablespoon of spiced rum and a pinch of ground nutmeg. The adult‑only version brings warmth and a festive spirit that’s perfect for holiday parties.
Vegan Velvet
Use coconut cream and dairy‑free white chocolate, and swap butter for a plant‑based margarine. The result is a vegan-friendly truffle that still boasts that melt‑in‑your‑mouth texture.
Storing and Bringing It Back to Life
Fridge Storage
Place the truffles in an airtight container lined with parchment paper. They keep fresh for up to 7 days, retaining their flavor and texture. If you notice condensation, gently pat the truffles dry with a paper towel before resealing.
Freezer Friendly
For longer storage, arrange the truffles on a tray, flash‑freeze for 2 hours, then transfer them to a zip‑top freezer bag. They’ll stay perfect for up to 3 months. When you’re ready to serve, let them thaw in the fridge for an hour, then bring them to room temperature for that melt‑in‑the‑mouth feel.
Best Reheating Method
If the truffles have hardened too much, place them on a plate, drizzle a tiny splash (about a teaspoon) of warm water around the edges, and cover with a loose piece of foil. Let them sit for 5 minutes; the steam will revive the coating without melting the interior.