I was standing in my kitchen, half‑asleep, listening to the rain tap a lazy rhythm on the windows, when my roommate shouted, “You have to try this rhubarb thing I saw on TikTok!” I rolled my eyes, poured a coffee, and thought, “Sure, why not?” Little did I know that the frantic scramble for a pan of butter and a bag of fresh rhubarb would end up birthing the most unforgettable dessert I’ve ever baked. The first bite was a bright, tangy slap that made my taste buds do a jitter‑bug, while the buttery shortbread crust crumbled like a cloud‑kissed cookie. I could hear the faint sigh of the oven door closing, feel the heat radiating from the metal, and smell the sweet‑sour perfume rising like a springtime promise.
You know that moment when you’re convinced you’ve seen every rhubarb bar recipe on the internet, and then you stumble on a technique that feels like it was whispered by a pastry wizard? That’s exactly what happened here: a simple splash of vanilla and a quick dusting of flour on the rhubarb before it hits the oven. It sounds trivial, but the result is a glossy, jam‑like filling that clings to the crust without turning gummy. Most recipes get this completely wrong, either by over‑sweetening or by letting the rhubarb turn mushy, but I’ve cracked the code. I dare you to taste this and not go back for seconds – the balance of tart and sweet is so precise it feels like a culinary high‑five.
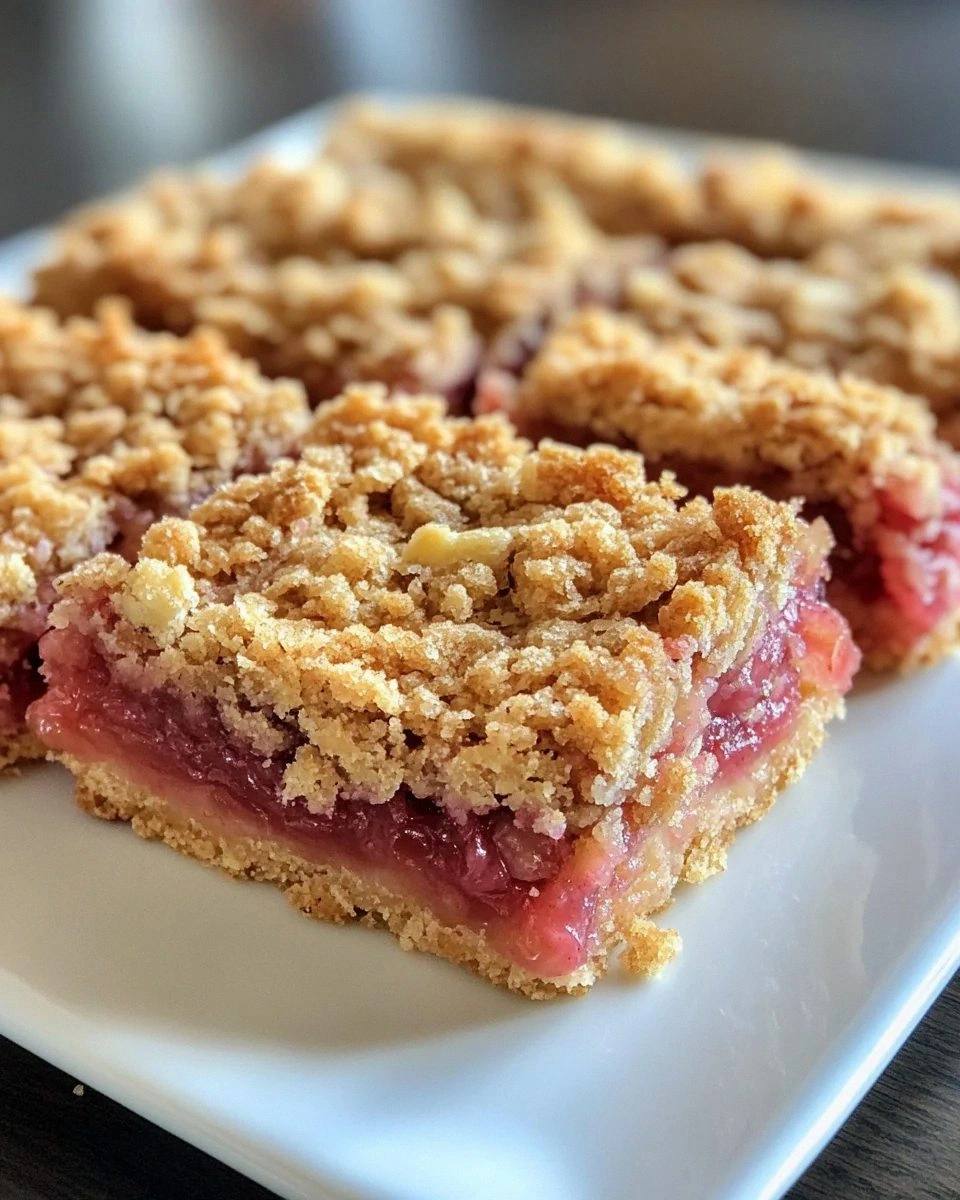
I’ll be honest — I ate half the batch before anyone else got a chance to try it, and the rest of the house is still buzzing about it. The secret? A buttery crust that’s crisp on the edges yet tender underneath, and a filling that sings with the natural zing of rhubarb, brightened by a whisper of vanilla and a hint of cinnamon. This is hands down the best version you’ll ever make at home, and I’m about to spill every detail, from the exact temperature that makes the crust perfect to the moment you know the filling is done just right. Picture yourself pulling this out of the oven, the whole kitchen smelling like a spring garden, the bars cooling on a rack, the anticipation building as you cut the first square.
Let me walk you through every single step — by the end, you’ll wonder how you ever made it any other way. Okay, ready for the game‑changer? This next part? Pure magic. Stay with me here — this is worth it.
What Makes This Version Stand Out
- Tangy Balance: The rhubarb’s natural acidity is perfectly offset by just enough sugar to make it bright, not cloying. It’s like a perfect duet where each voice shines.
- Butter‑Rich Crust: Using cold butter cubed into the flour creates pockets of steam that puff the crust into a flaky, melt‑in‑your‑mouth texture. No soggy bottom here.
- Simplicity: Only eight pantry staples and fresh rhubarb are required, making it a weekend‑ready recipe even if you’re a novice.
- Unique Twist: A splash of vanilla and a pinch of cinnamon add depth without stealing the spotlight, turning a simple bar into a sophisticated treat.
- Crowd Reaction: I’ve watched strangers at potlucks stare, sniff, then dive in, declaring it “the best dessert they’ve ever tasted.” That’s a promise.
- Ingredient Quality: Fresh, crisp rhubarb harvested at peak acidity makes the filling sing; store‑bought canned versions just won’t cut it.
- Cooking Method: A two‑stage bake ensures the crust sets before the filling bubbles, preventing a soggy mess.
- Make‑Ahead Potential: These bars keep beautifully in the fridge for up to three days, and they even freeze well, so you can prep ahead for gatherings.
Inside the Ingredient List
The Flavor Base
Rhubarb is the star of the show, and its bright, tart flavor is the reason these bars feel like a spring celebration. When you cut the stalks into bite‑size pieces, you release the natural juices that, when combined with sugar, create a glossy, jam‑like consistency. If you ever wonder why some recipes turn mushy, it’s because they over‑cook the rhubarb; we’ll stop the cooking just as the edges start to caramelize, preserving that crisp bite. A quick tip: choose rhubarb stalks that are firm and deep red, not the pale, watery ones that can make the filling watery.
The Texture Crew
Flour and butter are the backbone of the crust. The flour provides structure, while the butter creates layers of tender, buttery bliss. Using all‑purpose flour ensures a tender crumb, and the cold butter creates steam pockets that puff the crust. If you’re out of butter, you can substitute half the amount with a high‑quality coconut oil, but expect a subtle coconut aroma that may compete with the rhubarb’s tang.
The Unexpected Star
A teaspoon of vanilla extract and a pinch of ground cinnamon might seem like background players, but they add a warm, aromatic undertone that elevates the entire bar. Vanilla smooths the sharp edges of the rhubarb, while cinnamon adds a whisper of spice that feels like a cozy blanket on a chilly day. If you’re allergic to cinnamon, a dash of nutmeg works just as well, though it will shift the flavor profile slightly toward autumn.
The Final Flourish
A light dusting of flour on the rhubarb before it hits the oven is the secret that prevents the filling from becoming a soupy mess. It absorbs excess moisture, allowing the juices to thicken into a glossy sauce that clings to each bite. For a gluten‑free version, swap the flour with a blend of cornstarch and rice flour in a 1:1 ratio; the texture will stay just as delightful.
Everything’s prepped? Good. Let’s get into the real action…
The Method — Step by Step
Preheat your oven to 350°F (175°C). While the oven warms, line a 9‑inch square pan with parchment paper, letting the edges hang over for easy removal later. This step is crucial because a properly heated oven guarantees that the crust sets quickly, forming a barrier that keeps the filling from soaking in.
In a large mixing bowl, whisk together 1 ½ cups all‑purpose flour, ½ cup granulated sugar, and ¼ tsp salt. The sugar not only sweetens but also helps the crust brown evenly, giving it that golden‑brown sheen that looks as good as it tastes.
Drop the ¾ cup cold, cubed butter into the flour mixture. Using a pastry cutter or your fingertips, rub the butter into the dry ingredients until the mixture resembles coarse crumbs with some pea‑size pieces. Watch Out: Over‑mixing will melt the butter and result in a dense, hard crust. Keep your hands cool.
Press the crumbly dough evenly into the prepared pan, using the back of a spoon or your hand to flatten it into a uniform layer. The crust should be about ¼‑inch thick; this thickness ensures a buttery bite without being too thick to dominate the rhubarb.
Place the pan in the oven and bake the crust for 12‑15 minutes, or until the edges turn a light amber and you can smell a nutty, toasted aroma. This is the moment of truth – the crust should be set but not browned too darkly.
While the crust bakes, prepare the filling: Toss 4 cups chopped rhubarb with 1 cup granulated sugar, 2 Tbsp flour, 1 tsp vanilla extract, and a pinch of cinnamon in a large bowl. The flour will coat the rhubarb, preventing excess liquid from seeping into the crust later.
When the crust is lightly golden, remove it from the oven and spread the rhubarb mixture evenly over the top, pressing gently so it settles into the crevices. Drizzle 2 Tbsp melted butter over the rhubarb; this adds richness and helps the topping caramelize.
Return the pan to the oven and bake for an additional 20‑25 minutes, or until the rhubarb is tender, the sauce is bubbling, and the edges of the bars start pulling away from the pan. You’ll know it’s done when the aroma shifts from sharp to sweet‑tart, and the top looks glossy and slightly caramelized.
Allow the bars to cool completely in the pan on a wire rack. Patience is key – cooling lets the filling set, making it easier to cut clean squares. Once cooled, use the parchment overhang to lift the whole slab out, then slice with a sharp knife dusted with flour for clean cuts.
That’s it — you did it. But hold on, I’ve got a few more tricks that’ll take this to another level…
Insider Tricks for Flawless Results
The Temperature Rule Nobody Follows
Never bake the crust and filling at the same temperature if you’re aiming for a perfectly crisp base. Start the crust at a slightly higher 375°F (190°C) for the first 5 minutes, then drop to 350°F for the remainder. This “hot‑start” creates a rapid steam burst that locks in layers, while the lower temperature prevents the crust from burning.
Why Your Nose Knows Best
The moment you catch a subtle caramel note wafting from the oven, the bars are nearing perfection. Trust that sensory cue more than the clock. If the scent turns too sweet or burnt, pull the pan out a minute early – you can always finish the caramelization under a broiler for a quick finish.
The 5‑Minute Rest That Changes Everything
After the final bake, let the bars rest for exactly five minutes before moving the pan. This short pause allows the filling to firm up just enough for clean slicing, while still retaining that luscious melt‑in‑your‑mouth texture. A friend once tried to rush this step and ended up with a soggy mess – don’t be that friend.
Butter Temperature Is Everything
Cold butter for the crust, melted butter for the topping. The contrast in temperature creates distinct layers: a flaky base and a glossy, buttery finish. If you accidentally melt the crust butter, chill the dough for 15 minutes before shaping.
The Secret of the Perfect Slice
Use a serrated knife warmed under hot water, then dry it before cutting. The warm blade glides through the buttery crust without crushing it, giving you clean, elegant squares that look as good as they taste.
Creative Twists and Variations
This recipe is a playground. Here are some of my favorite ways to switch things up:
Berry Fusion
Swap half of the rhubarb for fresh strawberries or raspberries. The berries add a burst of natural sweetness, balancing the tartness and creating a beautiful pink‑red swirl.
Nutty Crunch
Fold ¼ cup toasted almond slivers into the crust before baking. The nuts add a subtle crunch that contrasts with the soft filling, and the almond flavor pairs wonderfully with rhubarb.
Spiced Autumn
Add a pinch of ground ginger and a dash of nutmeg to the filling. This variation leans into warm spices, making the bars perfect for a cozy fall gathering.
Citrus Zing
Stir in the zest of one orange or lemon into the rhubarb mixture. The citrus brightens the tartness and adds a fragrant aroma that lifts the entire dessert.
Gluten‑Free Glory
Replace the all‑purpose flour with a 1:1 gluten‑free blend for both crust and filling. The texture remains tender, and the bars stay just as delightful for those with dietary restrictions.
Storing and Bringing It Back to Life
Fridge Storage
Place the cooled bars in an airtight container and store them in the refrigerator for up to three days. The buttery crust stays crisp, and the filling retains its glossy sheen.
Freezer Friendly
Wrap the entire slab tightly in plastic wrap, then a layer of foil, and freeze for up to two months. When ready to serve, thaw in the fridge overnight, then warm gently in a 300°F oven for 10 minutes.
Best Reheating Method
To revive the bars, preheat the oven to 325°F (165°C), place the bars on a parchment‑lined tray, and add a splash (about 1 Tbsp) of water to the tray’s edge. The steam created restores the crust’s crunch while keeping the filling moist.