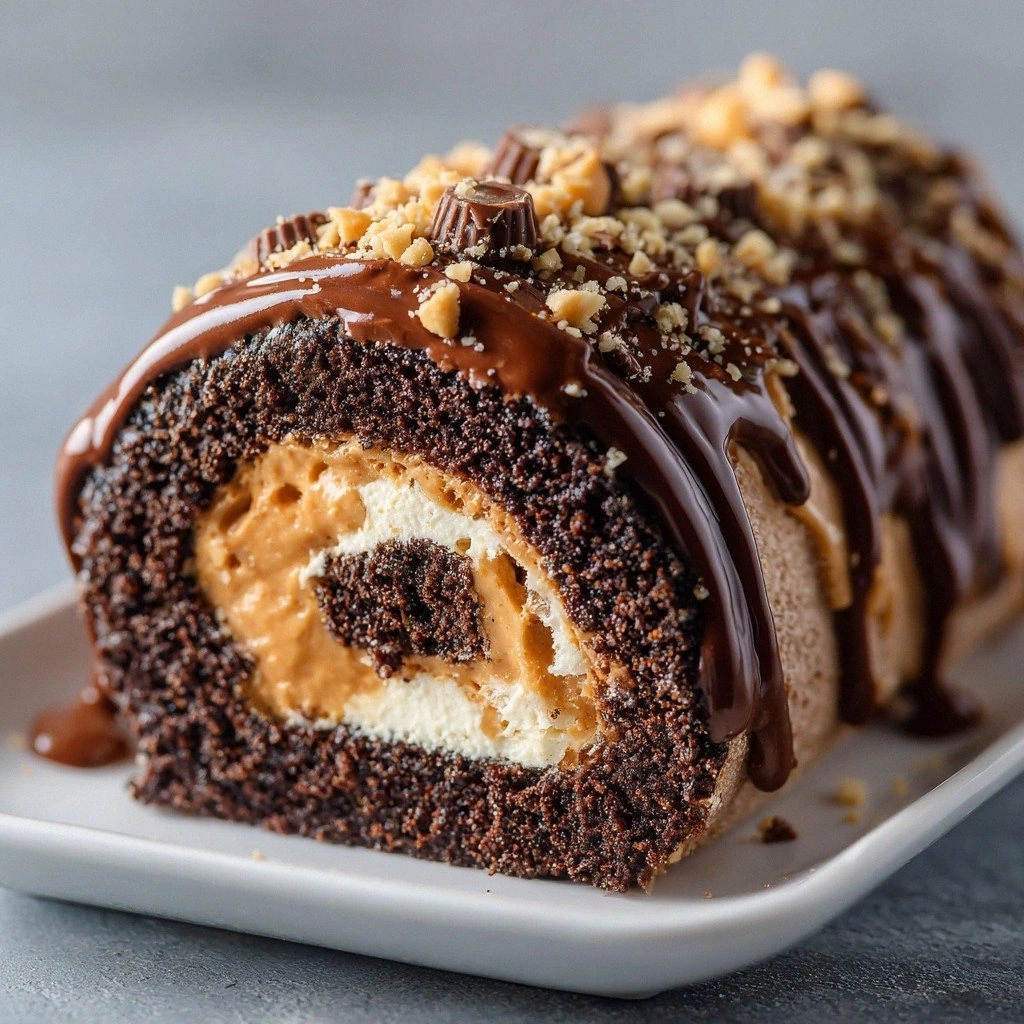
Picture this: I was halfway through a midnight snack raid, eyes glued to the fridge, when the cupboard door slammed shut with a thud that echoed through the kitchen. The scent of burnt sugar hit me like a slap, and my heart rate spiked. I realized I had been chasing the wrong chocolate fix all my life. That night, I decided to rewrite the peanut butter cup story, and the result was a roll that practically melts the moment you touch it. I dare you to taste this and not go back for seconds.
The moment you open the bag, the aroma of dark chocolate mingles with the buttery sweetness of peanut butter, creating a perfume that makes even the most disciplined foodie swoon. The sound is a gentle hiss as the batter slides onto the parchment, followed by a crackle when the first few seconds of baking begin. The texture is a delicate balance of soft, almost custard-like interior with a crisp, glossy exterior that shatters like thin ice when you bite. The flavor profile is a layered experience: a deep cocoa bite, a velvety peanut butter center, and a subtle sea salt finish that lifts everything. If you've ever struggled with peanut butter cups that taste flat or over-sweet, you're not alone—and I've got the fix.
What sets this version apart is not just the ingredients but the method. I use a combination of baking soda and baking powder to give the batter a lift that keeps it airy, and the chocolate chips are folded in at the last moment to preserve their snap. The peanut butter is spread while the roll is still warm, allowing it to seep into every crevice. The result is a dessert that feels like a chocolate roll with a peanut butter heart, yet it stands alone as a showstopper. I’ve been told this is hands down the best version you'll ever make at home.
And that’s just the tip of the chocolatey iceberg. A secret ingredient—a dash of espresso powder—amplifies the chocolate depth, and the final touch of sea salt on top creates a contrast that keeps the palate intrigued. If you’re ready for a game-changer, stay with me—by the end of this post, you’ll wonder how you ever made it any other way.
What Makes This Version Stand Out
- Flavor: The blend of dark chocolate and peanut butter creates a harmony that feels both indulgent and sophisticated, leaving you craving more.
- Texture: A soft, custard-like interior meets a crisp, glossy exterior that shatters with a satisfying snap.
- Airiness: Baking soda and baking powder give the roll a lift, preventing it from feeling dense or heavy.
- Finish: A light dusting of sea salt on top enhances the chocolate and peanut butter flavors without overpowering.
- Make‑ahead: The roll can be assembled ahead of time, chilled, and served cold or reheated for a warm, gooey experience.
- Versatility: Swap the peanut butter for almond butter or add a swirl of caramel for a different flavor profile.
- Visual Appeal: The glossy chocolate surface and the visible peanut butter swirl make it Instagram-worthy.
Alright, let's break down exactly what goes into this masterpiece…
Inside the Ingredient List
The Flavor Base
All-purpose flour is the backbone of the batter, providing structure and a neutral canvas that lets the chocolate shine. Without it, the roll would crumble like a cookie. If you skip the flour, you’ll end up with a sticky, uncoordinated mess. For best results, sift the flour to aerate it and keep the batter light.
The Texture Crew
Unsweetened cocoa powder adds depth and a rich, bittersweet note that balances the sweetness of the peanut butter. Baking soda and baking powder lift the batter, creating pockets of air that keep the roll airy. Salt is essential; it heightens the chocolate flavor and cuts through the sweetness. If you’re feeling adventurous, a pinch of cayenne can add a subtle heat that surprises the palate.
The Unexpected Star
The creamy peanut butter is the star that gives this roll its signature center. It’s not just any peanut butter—choose a natural, no‑added‑sugar variety to keep the sweetness in check. The chocolate chips are folded in last to preserve their snap and prevent them from melting into the batter. The sea salt on top is the finishing touch that turns a good roll into a great one.
The peanut butter’s natural oils help keep the roll moist, while the chocolate’s cocoa butter gives it a glossy finish. If you prefer a dairy-free version, swap the butter for coconut oil and use dairy-free chocolate chips.
The Final Flourish
Sea salt is more than a garnish; it’s a flavor enhancer that brings out the chocolate’s complexity. A light dusting on top creates a visual contrast and a burst of flavor with each bite. If you’re watching your sodium intake, use a low-sodium sea salt or skip it entirely—just remember the chocolate will taste slightly sweeter.
Everything's prepped? Good. Let's get into the real action…
The Method — Step by Step
- Preheat your oven to 350°F (175°C) and line a 9x13-inch baking pan with parchment paper. The parchment prevents sticking and gives the roll a clean edge. Place the pan on the middle rack so heat distributes evenly. If you’re in a rush, preheat the oven now while you prep the batter.
- In a medium bowl, whisk together 2 cups all-purpose flour, 1/2 cup unsweetened cocoa powder, 1 tsp baking soda, 1 tsp baking powder, and 1/2 tsp salt. The dry mix should look like a fine, dark dust. This step ensures the leavening agents are evenly distributed.
- In a large mixing bowl, cream 1 cup softened butter with 1 cup granulated sugar until light and fluffy. Add 2 large eggs, one at a time, beating well after each addition. Stir in 1 tsp vanilla extract and 0.25 tsp espresso powder. This mixture should have a silky texture.
- Gradually fold the dry ingredients into the wet mixture, stirring until just combined. The batter should be thick but pourable. Be careful not to overmix, or the chocolate chips may break and lose their snap. The batter should smell toasty when you stir.
- Spread the batter evenly onto the prepared pan. The edges should be smooth and the surface glossy. Bake for 20-25 minutes, or until a toothpick inserted into the center comes out with a few moist crumbs. The batter will rise and then settle slightly.
- Let the cake cool in the pan for 10 minutes, then transfer it onto a wire rack. While still warm, spread 1 cup creamy peanut butter evenly over the surface. The heat will soften the peanut butter, allowing it to seep into the batter.
- Starting at one end, roll the cake tightly using parchment paper to keep it from sticking. Once rolled, place the roll seam side down on a parchment-lined tray. Chill in the refrigerator for at least 30 minutes to set the peanut butter.
- Slice the chilled roll into 1/2-inch thick pieces. Dust each slice lightly with sea salt for an extra burst of flavor. Serve immediately or store in an airtight container for up to 3 days.
That's it — you did it. But hold on, I've got a few more tricks that'll take this to another level…
Insider Tricks for Flawless Results
The Temperature Rule Nobody Follows
The batter should be at room temperature before mixing. Cold butter will create pockets of air, causing the roll to rise unevenly. Keep the butter soft but not melted; if it’s too soft, the batter will be too runny. I’ve seen people bake with melted butter and end up with a flat, crumbly cake.
Why Your Nose Knows Best
Before you pull the roll out of the oven, take a deep breath of the freshly baked batter. If it smells like a toasted marshmallow, it’s ready. If you can still smell raw flour, give it a few more minutes. Your nose is the fastest way to gauge doneness.
The 5-Minute Rest That Changes Everything
Letting the cake rest for 5 minutes after baking allows the moisture to redistribute. This step prevents a dry center and gives the peanut butter a chance to spread evenly. Skipping this step can result in a crumbly roll that’s hard to slice.
The Secret of Even Rolling
Use a clean, damp towel to smooth the edges before rolling. This helps the parchment stay on the cake and prevents the roll from slipping. A light dusting of cocoa powder on the towel adds extra flavor and keeps the roll from sticking.
The Final Seal
Once rolled, seal the seam with a thin layer of melted chocolate. This not only keeps the roll from unraveling but also adds a glossy finish that looks as good as it tastes. If you’re vegan, use dairy-free chocolate or a drizzle of melted coconut oil for the seal.
Creative Twists and Variations
Almond Bliss Roll
Swap the peanut butter for almond butter and add a handful of chopped almonds for crunch. The nutty flavor pairs beautifully with the chocolate, making it a sophisticated twist.
Caramel Swirl Surprise
Fold in a swirl of caramel sauce before rolling. The sweet, buttery caramel adds a luxurious layer that melts in your mouth.
Minty Fresh Roll
Add a few drops of peppermint extract to the batter and sprinkle crushed mint candies on top before sealing. The mint gives a refreshing aftertaste that cuts through the richness.
Seaweed Salt Variation
Replace sea salt with a pinch of seaweed salt for an umami kick. The subtle brininess complements the chocolate and peanut butter in a surprisingly balanced way.
Vegan Chocolate Roll
Use coconut oil instead of butter, dairy-free chocolate chips, and a plant-based peanut butter. The texture remains silky, and the flavor profile stays true to the original.
Citrus Zest Delight
Add a teaspoon of orange zest to the batter for a citrusy brightness. The zest brings a bright, fragrant note that lifts the chocolate.
Storing and Bringing It Back to Life
Fridge Storage
Store the sliced roll in an airtight container in the refrigerator for up to 3 days. The cold will keep the peanut butter firm and the chocolate firm. Avoid stacking slices too tightly; a slight separation prevents crushing.
Freezer Friendly
Wrap each slice tightly in plastic wrap and place them in a freezer bag. Freeze for up to 2 months. Thaw overnight in the refrigerator before serving to preserve texture.
Best Reheating Method
To revive a frozen slice, microwave on low power for 10-15 seconds. Add a tiny splash of water before reheating; it steams the chocolate, keeping it silky. Avoid overheating, or the peanut butter may separate.