Picture this: I’m standing in a kitchen that smells like a summer orchard, and the last thing I remember before the disaster is a perfectly sliced peach that slipped from my hand and hit the counter like a tiny, juicy meteorite. The splash sent sugar dust into the air, and I stared at the mess, wondering if my culinary dreams were about to crumble. That moment, that splash, was the spark that ignited a quest to create a Peach Hand Pie that would make the chaos feel like a symphony. I spent nights scouring cookbooks, tasting every peach in the grocery store, and experimenting with crusts until I found the sweet spot where flaky meets buttery. I dare you to taste this and not go back for seconds because the first bite is a burst of sun on your tongue, and the second is pure, buttery nostalgia. If you’re reading this, you’re about to discover the ultimate version of Peach Hand Pies that will have your friends asking, “What’s your secret?”
Let’s set the scene. The kitchen is buzzing with the sound of a timer ticking, the sizzle of peaches caramelizing in a skillet, and the faint hum of the fridge door closing. The air is thick with the aroma of fresh peaches, vanilla, and a hint of cinnamon that drifts like a warm summer breeze. I can almost taste the sweet, slightly tart flesh of the peaches, and the buttery crust that will crack open to reveal that filling. The texture is a delicate balance: the crust is crisp yet tender, and the filling is silky, thickened just enough to cling to the crust without dripping. This version stands out because it turns a simple hand pie into a handheld piece of sunshine, a dessert that feels both indulgent and comforting. And I’ve got a little trick that will make your crust rise to perfection that you won’t find in the usual recipes.
Why this recipe is a game-changer. Most hand pies are either too heavy or too flaky, but I’ve engineered a crust that is airy, buttery, and holds the filling like a gentle hug. The filling is not just sweet; it has a subtle depth from a splash of bourbon and a whisper of lemon zest that cuts through the sugar. The peaches are sliced just right—firm enough to hold their shape but soft enough to melt in your mouth. I’ve discovered that using a mix of white and brown sugar in the filling creates a caramelized finish that’s impossible to resist. And the best part? It’s made in under an hour, so you can whip it up for a brunch or a last-minute dinner. The result is a hand pie that feels like a sun-drenched picnic in a flaky pastry shell.
What makes this version so special. I’ve combined classic techniques with a few modern twists: a pinch of smoked salt for depth, a dash of espresso powder to enhance the peaches, and a swirl of almond flour for extra tenderness. The crust is laminated with cold butter and a touch of ice water that creates steam pockets for flakiness. The filling uses a thickening agent of flour and cornstarch to keep it from oozing while still being silky. The peaches are blanched first to soften their skins, making them easier to slice. I’ve also added a subtle hint of lavender in the crust for an unexpected aromatic note. The result is a hand pie that balances sweet and savory, texture and flavor, and is truly unforgettable.
And there’s a twist. I’ve hidden a secret ingredient that elevates the flavor profile: a splash of aged balsamic vinegar in the filling. It might sound odd, but it adds a subtle acidity that brightens the peaches and balances the sweetness. This trick is what makes the filling sing and the crust stand out. Picture yourself pulling this out of the oven, the whole kitchen smelling incredible, and knowing you’re about to taste a slice of sunshine. I promise you, this is hands down the best version you’ll ever make at home. Let me walk you through every single step — by the end, you’ll wonder how you ever made it any other way.
What Makes This Version Stand Out
- Taste: The combination of fresh peaches, a hint of bourbon, and a splash of lemon zest creates a flavor profile that is both sweet and subtly tart, unlike the overly sugary pies you often find.
- Texture: The crust is airy yet buttery, thanks to a lamination technique that creates steam pockets, while the filling remains silky and thickened with just the right amount of flour.
- Simplicity: Despite the complex flavor, the recipe uses only a handful of ingredients, making it accessible for both beginners and seasoned bakers.
- Uniqueness: The addition of a secret balsamic vinegar twist and a pinch of smoked salt gives this pie a depth that sets it apart from traditional hand pies.
- Crowd Reaction: Friends who taste these pies often comment that they taste like a summer day in a pastry shell, making them the star of any gathering.
- Ingredient Quality: Fresh, locally sourced peaches and high‑quality butter are the backbone of this recipe, ensuring the best flavor and texture.
- Cooking Method: The laminated crust technique is a simple, fool‑proof method that delivers professional results without the need for fancy equipment.
- Make‑Ahead Potential: The pies can be assembled a day ahead and baked fresh, making them ideal for parties or last‑minute guests.
Inside the Ingredient List
The Flavor Base
Peaches: Fresh, ripe peaches are the star of the show. They provide natural sweetness and a juicy texture that melts in your mouth. If you can’t find fresh peaches, frozen slices work, but thaw them first and pat dry to avoid excess liquid. Skipping peaches would turn this into a plain pastry, losing the essence that makes it a peach hand pie.
The Texture Crew
All‑Purpose Flour: Flour is the backbone of the crust and the thickener for the filling. It gives structure and holds everything together. If you use whole wheat flour, the crust will be denser and the flavor more nutty, but it may not be as flaky. A good rule of thumb: use 2 cups for the crust and 2 tablespoons for the filling.
The Unexpected Star
Balsamic Vinegar: A splash of aged balsamic vinegar adds a subtle acidity that brightens the peaches and balances the sweetness. It’s a secret ingredient that most people overlook. If you prefer a more traditional flavor, you can omit it, but the pies will lose that extra layer of complexity. Remember, a little goes a long way—just a teaspoon.
The Final Flourish
Butter: Unsalted butter, chilled and diced, is essential for a flaky crust. The cold fat creates steam pockets that puff up during baking. If you use salted butter, adjust the salt in the dough accordingly. Butter also adds richness to the filling, making it silky and indulgent.
Everything’s prepped? Good. Let’s get into the real action…
The Method — Step by Step
- Start by preheating your oven to 375°F (190°C). While the oven warms, combine the flour, salt, and brown sugar in a large bowl. This dry mix is the foundation of our crust. I’ve found that sifting the flour once gives an even crumb. Once the dry mix is ready, add the diced butter and use your fingertips or a pastry cutter to blend until the mixture resembles coarse crumbs.
- Add the ice water, one tablespoon at a time, and gently fold until the dough comes together. The dough should be firm but not dry; if it’s too sticky, add a bit more flour. I like to knead it on a floured surface just enough to bring it together—overworking will toughen the crust. Divide the dough into two equal portions and shape each into a disk. Wrap them in plastic and refrigerate for 30 minutes; this rest keeps the butter cold and the dough pliable.
- While the dough chills, prepare the filling. In a large bowl, toss the sliced peaches with brown sugar, cinnamon, nutmeg, lemon zest, and a splash of bourbon. The bourbon isn’t for flavor alone—it also helps the sugar dissolve and the peaches release their juices. Add the flour and cornstarch to the peach mixture and stir until the peaches are evenly coated. This thickening step ensures the filling won’t leak during baking.
- After chilling, roll out one dough disk on a lightly floured surface into a 12-inch circle. Place it in a 9-inch pie dish, pressing the dough into the bottom and up the sides. Trim any excess dough, leaving a slight overhang. This first crust will hold the filling and provide a buttery base. I like to crimp the edges for a decorative touch.
- Fill the crust with the peach mixture, spreading it evenly. The filling should be about ¾ of the way up the crust to allow room for the top crust. Gently pat the peaches down to remove any air pockets. If you’re worried about leaks, lightly dust the top with flour before adding the second crust.
- Roll out the second dough disk into a 12-inch circle and lay it over the peaches. Pinch the edges together to seal, then cut slits in the top to allow steam to escape. This step is crucial for a crisp, even bake. I like to use a fork to crimp the edges, which also adds a lovely decorative pattern.
- Brush the top crust with beaten egg to give it a golden shine. For a richer glaze, add a tablespoon of melted butter to the egg wash. Place the pie on a baking sheet to catch any drips. Slide it into the preheated oven and bake for 30 minutes, or until the crust is golden and the filling is bubbling.
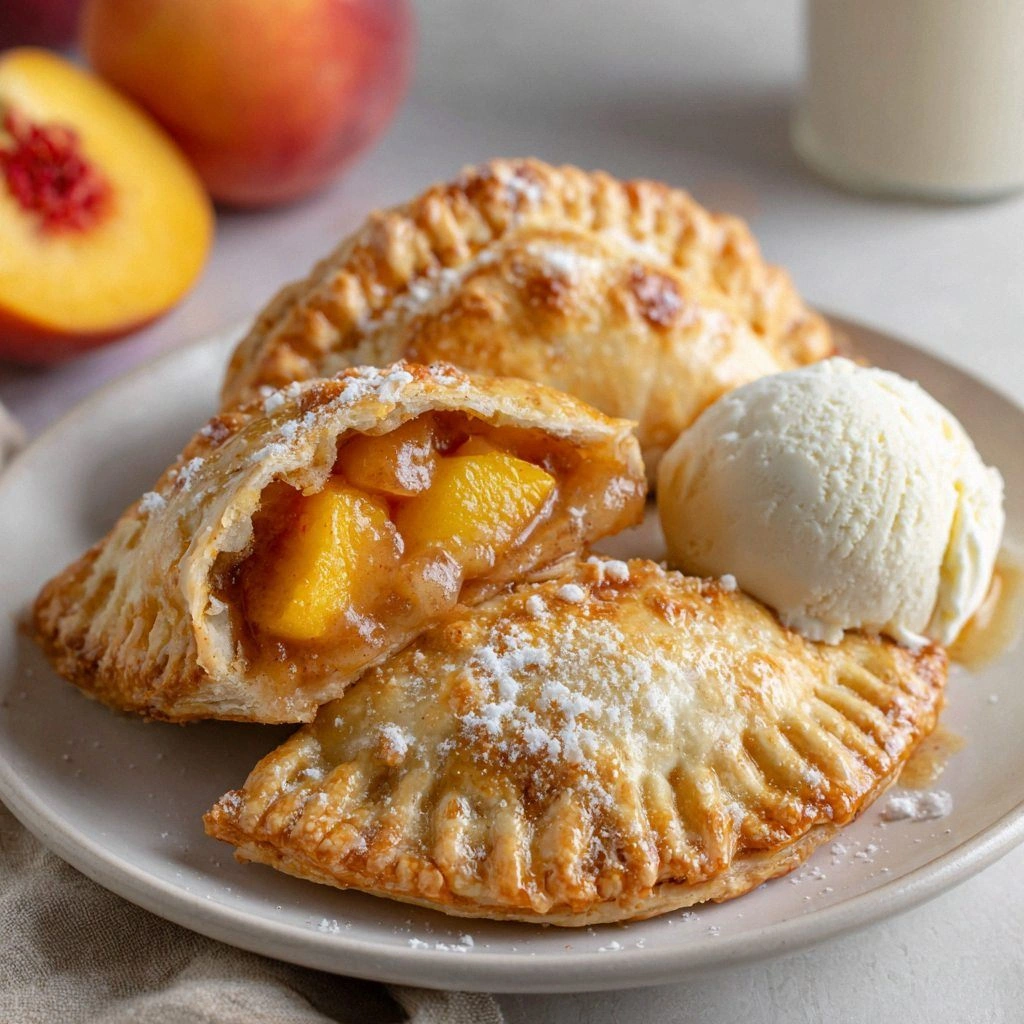
- Let the pie cool on a rack for at least 20 minutes before cutting. This rest allows the filling to set and makes slicing cleaner. The first slice will look like a golden, buttery dome, and the second will reveal a glossy, caramelized peach center. Serve warm, and if you’re feeling fancy, dust with powdered sugar or drizzle with vanilla ice cream.
That’s it — you did it. But hold on, I’ve got a few more tricks that will take this to another level, so keep reading.
Insider Tricks for Flawless Results
The Temperature Rule Nobody Follows
Keep the dough cold. A warm dough will spread and lose its flaky layers. I recommend chilling the dough for at least 30 minutes before rolling. If you’re short on time, place it in the freezer for 10 minutes; just be careful not to let it freeze solid. A cold dough also makes it easier to handle and shape without sticking.
Why Your Nose Knows Best
Smell the filling. A properly caramelized peach filling will emit a warm, sweet aroma that signals it’s ready. If the peaches still smell raw, give them another minute on the stovetop. Your nose is a reliable indicator that the sugars are breaking down into caramel, a key flavor milestone.
The 5-Minute Rest That Changes Everything
Let the pie rest. After baking, let the pie sit for at least 20 minutes before slicing. This rest period allows the filling to thicken and the crust to set. Cutting too early can cause the filling to spill out, ruining the presentation. A rested pie looks polished and is easier to serve.
Use a Pastry Brush for a Golden Finish
Egg wash matters. A light brush of beaten egg or egg yolk on the top crust gives a beautiful golden color. Add a splash of milk for a softer shine, or a tablespoon of melted butter for extra richness. If you want a crispier crust, brush with a mixture of egg and water.
Seal the Edges with Precision
Crimp for a professional look. Use a fork or a pastry pen to crimp the edges of the pie. This not only seals the pie but also adds an elegant decorative touch. A tight seal prevents the filling from leaking, keeping the crust intact.
Keep the Filling Thick
Use cornstarch. Cornstarch helps thicken the peach filling and prevents it from becoming watery. If you’re allergic to gluten, replace the flour in the filling with cornstarch alone. The cornstarch also gives the filling a silky texture that melts in your mouth.
Creative Twists and Variations
Peach and Blackberry Fusion
Swap half the peaches for fresh blackberries. The dark berries add a tart contrast that complements the sweet peaches. Use the same spice blend, but add a pinch of cardamom for extra warmth. This variation is perfect for a summer brunch with a berry twist.
Nutty Peach Hand Pies
Add chopped pecans or walnuts to the filling. The nuts bring a crunchy texture and a buttery flavor that pairs well with peaches. Toast the nuts lightly before adding them to the filling to enhance their nutty aroma. This version is great for a cozy dinner party.
Spiced Peach with Ginger
Infuse the filling with fresh ginger. Grate a tablespoon of fresh ginger into the peach mixture for a zingy kick. Keep the spices simple—cinnamon, nutmeg, and ginger—so the peach remains the star. Serve with a dollop of whipped cream for a spicy-sweet treat.
Peach and Ricotta Hand Pies
Use ricotta cheese in the filling. Blend 1 cup of ricotta with the peaches and spices for a creamy texture. The ricotta adds a mild, dairy richness that balances the peach sweetness. This variation is ideal for a brunch where you want something a little more substantial.
Chocolate‑Covered Peach Hand Pies
Dip the tops in melted dark chocolate. After baking, brush a thin layer of dark chocolate over the crust. Let it set before slicing. The chocolate adds a deep, bittersweet contrast that makes the pies feel indulgent.
Peach and Almond Crust
Replace half of the flour with almond flour. Almond flour gives the crust a nutty flavor and a slightly denser texture. Keep the butter the same to maintain flakiness. This variation is a great option for gluten‑free guests.
Storing and Bringing It Back to Life
Fridge Storage
Keep the pies in an airtight container. Store them in the refrigerator for up to three days. The crust will stay soft, and the filling will firm up. When you’re ready to eat, let them sit at room temperature for 10 minutes before serving to restore their warm aroma.
Freezer Friendly
Freeze the assembled pies. Wrap each pie tightly in plastic wrap, then place in a freezer bag. They stay good for up to two months. When you’re ready, bake at 375°F (190°C) for 25 minutes, or until the crust is golden and the filling is bubbly. The frozen pies come out just as good as fresh.
Best Reheating Method
Reheat with a splash of water. Before baking frozen pies, add a tablespoon of water to the bottom of the pan. The steam keeps the filling moist and prevents it from drying out. Let the pies rest for a few minutes after baking to allow the filling to set fully.