You know that moment when you’re scrambling to salvage a dessert disaster, and the kitchen feels like a war zone? I was standing over a pot of over‑boiled rice cereal, my peanut butter still in its jar, and the chocolate chips were stubbornly clinging to the bottom of the pan. The air smelled like burnt sugar and regret, and I could hear the faint hiss of a forgotten kettle. I stared at the mess, then grinned like a kid who’d just discovered a secret door. “It’s time to make the best Rice Krispie cups ever,” I declared, because if there’s one thing I’ve learned, it’s that the best recipes are born from a dash of chaos.
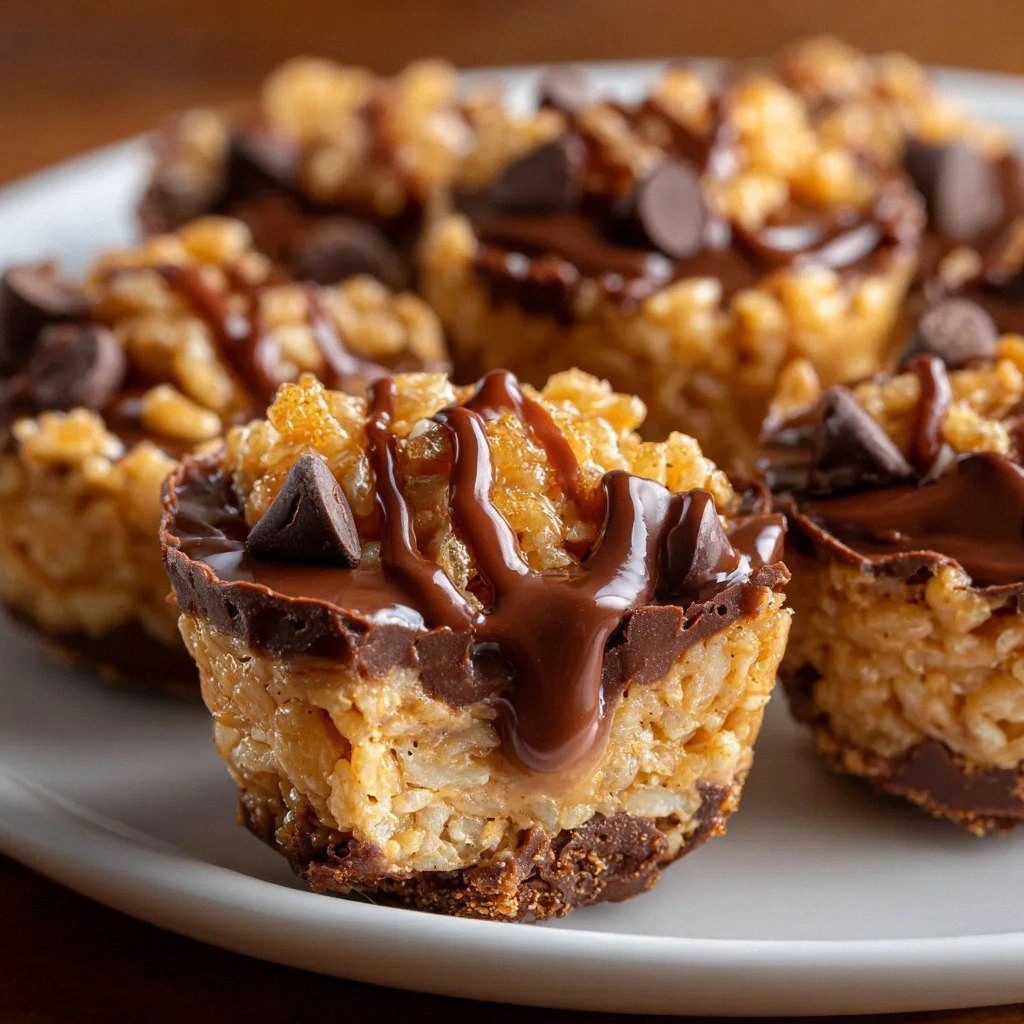
Picture this: a handful of crisp rice cereal pieces, each one a tiny white cloud of crunch that shatters like thin ice under your teeth. The peanut butter, thick and creamy, coats the cereal like velvet, filling every crevice with a nutty, buttery aroma that makes your nose do a happy dance. Then, the chocolate chips melt into a glossy river of cocoa, swirling and pooling in a way that looks almost like a decadent waterfall. The honey glints in the light, adding a golden sheen that promises a touch of natural sweetness, while the vanilla extract releases a subtle, floral whisper that ties everything together. The final result? A bite‑size confection that is simultaneously crunchy, gooey, and utterly irresistible.
Why does this version stand out from every other Rice Krispie cup recipe you’ve tried? Because it’s the ultimate balance of texture and flavor, and it’s so simple you can whip it up in under 30 minutes. The peanut butter isn’t just a filler; it’s the heart of the mix, delivering a rich, nutty depth that chocolate alone can’t match. The honey acts as a natural binder, eliminating the need for any artificial glues or butter, while the vanilla extract lifts the entire flavor profile into the realm of gourmet. And the best part? No oven, no baking, no complicated steps—just a few quick melts and a handful of scoops.
I’ll be honest—when I first tasted these cups, I ate half the batch before anyone else even had a chance. That’s the power of a recipe that’s so good it practically sells itself. I dare you to taste this and not go back for seconds. Picture yourself pulling these out of the fridge, the whole kitchen smelling incredible, and watching the chocolate ripple as you break a cup in half. Let me walk you through every single step—by the end, you’ll wonder how you ever made it any other way.
What Makes This Version Stand Out
- Taste: The peanut butter adds a savory depth that balances the sweetness of honey and chocolate, creating a complex flavor profile that’s far from ordinary.
- Texture: The crunchy Rice Krispies stay crisp, while the melted chocolate and peanut butter form a smooth, gooey center that melts in your mouth.
- Speed: Every step is a no‑bake, no‑oven process that can be completed in under 30 minutes, making it perfect for last‑minute cravings.
- Versatility: This recipe works as a snack, an after‑dessert, or a party treat—just adjust the size of the cups and you’re ready to serve.
- Ingredient Quality: Using high‑quality peanut butter and dark chocolate elevates the flavor and gives the cups a luxurious finish.
- Make‑Ahead Potential: These cups keep wonderfully in the fridge for up to a week, and they even freeze well for a quick, instant snack.
- Visual Appeal: The glossy chocolate coating and the contrast of white cereal against dark chocolate create a mouth‑watering look that’s Instagram‑ready.
- Kid‑Friendly: No cooking equipment or dangerous temperatures—just a few simple steps that even a 10‑year‑old can help with.
Inside the Ingredient List
The Crunch Crew
Rice Krispies are the backbone of this recipe, providing that signature crunch that keeps the cups from becoming soggy. The cereal’s light, airy texture ensures a satisfying bite that contrasts perfectly with the creamy center. If you can’t find Rice Krispies, try using puffed rice cereal or even crushed corn flakes, but be sure to adjust the amount so the cups don’t become too dry. Skipping this ingredient would strip the dish of its essential crunch, turning it into a plain chocolate‑peanut butter spread.
The Flavor Base
Creamy peanut butter is the star of the flavor lineup. It brings a rich, nutty undertone that balances the sweetness of the honey and the intensity of the chocolate. For a different twist, try using crunchy peanut butter to add an extra layer of texture, or switch to almond butter for a subtle, floral note. If you’re allergic to nuts, a sunflower seed butter works as an excellent substitute, though the flavor profile will shift slightly toward a milder, earthier taste.
The Sweetener
Honey is more than just a binder; it adds a golden sheen and a natural sweetness that’s far superior to refined sugar. The floral undertones of honey can complement the chocolate, creating a complex flavor profile that feels both indulgent and wholesome. If you prefer a less sweet version, use a small amount of maple syrup, but be prepared for a slightly different taste and a slightly darker color. Skipping honey entirely will make the cups dry and less cohesive.
The Final Flourish
Vanilla extract is the subtle finishing touch that elevates the entire dish. It rounds out the nutty and chocolatey notes, giving the cups a smooth, fragrant finish. A splash of almond extract can replace vanilla for a slightly different aroma, but vanilla remains the classic choice. If you’re short on vanilla, a pinch of cinnamon can add a warm spice that pairs wonderfully with the chocolate.
Everything's prepped? Good. Let's get into the real action.
The Method — Step by Step
- Start by placing 2 cups of Rice Krispies into a large mixing bowl. Make sure the cereal is evenly distributed so every bite gets that signature crunch. This step might seem trivial, but it sets the foundation for the entire texture profile. As you stir, you’ll hear the gentle clink of cereal—a promise of the crunch to come.
- In a small saucepan, combine 1 cup of creamy peanut butter with 1/4 cup of honey over low heat. Stir constantly until the mixture is smooth and glossy, about 3–4 minutes. Watch for the honey to thicken slightly; this is your binding agent. The aroma that fills the kitchen will have you wondering if you’re about to bake a cake.
- Remove the saucepan from heat and stir in 1 teaspoon of vanilla extract. The vanilla’s floral note will lift the peanut butter, giving it a more complex flavor. Let the mixture cool for a minute so it doesn’t melt the chocolate later. If you’re in a hurry, you can skip this cooling period, but the texture will be slightly different.
- Now, pour the peanut butter mixture over the Rice Krispies. Toss gently with a spoon until every cereal piece is coated. The mixture should be glossy, but not overly wet—think of a thick, caramelized glaze. This step is where the magic happens: the crunch meets the goo.
- Divide the coated cereal into 12 equal portions, using a small cookie scoop or a tablespoon. Press each portion firmly into a silicone muffin cup or a lined muffin tin. The cups should be compact but not packed too tight, allowing the chocolate to set properly. This is the moment where you can get creative with shapes—think heart‑shaped or star‑shaped molds for a fun twist.
- Place the filled cups in the refrigerator for 10 minutes to set the peanut butter coating. During this time, the chocolate chips will begin to melt slightly from the warmth of the peanut butter. After 10 minutes, remove the cups from the fridge and transfer them to a microwave-safe bowl. This is the trickiest step, so stay focused.
- Microwave the chocolate chips on high for 30 seconds, then stir. Repeat in 15‑second increments until the chocolate is fully melted and smooth. The key is to avoid overheating, which can cause the chocolate to seize. Once melted, pour the chocolate evenly over the tops of the cups, ensuring each cup gets a generous coating.
- Return the cups to the refrigerator for another 15 minutes, or until the chocolate has fully set and the cups feel firm to the touch. The setting time will vary depending on your fridge’s temperature, but the goal is a crisp, chocolate‑coated exterior. During this time, the cups will develop a glossy finish that’s almost irresistible.
- Once set, remove the cups from the refrigerator and let them sit at room temperature for 5 minutes before serving. This brief rest allows the chocolate to develop a slight sheen and the peanut butter to set just enough for a perfect bite. The aroma will be intoxicating, and the texture will be a delightful mix of crunch and melt.
- Serve immediately, or store them in an airtight container in the fridge for up to a week. If you plan to keep them longer, wrap each cup individually in parchment paper to prevent sticking. When you’re ready to enjoy, simply pop a cup in the microwave for 5–10 seconds to soften the chocolate, making it even more indulgent.
That's it — you did it. But hold on, I've got a few more tricks that'll take this to another level.
Insider Tricks for Flawless Results
The Temperature Rule Nobody Follows
Peanut butter melts at a lower temperature than chocolate, so timing is crucial. If you let the peanut butter cool too much before adding the chocolate, the chocolate will harden too quickly, leading to uneven coating. A quick tip: keep the peanut butter warm by placing the bowl in a pot of very warm water, but not hot, to maintain a steady temperature. This small adjustment ensures a silky chocolate glaze that drapes perfectly over each cup.
Why Your Nose Knows Best
Smell is your most reliable indicator of readiness. When the chocolate is perfectly melted, it will emit a rich, warm aroma that fills the kitchen. If the chocolate starts to smell burnt or metallic, stop immediately and reheat gently. A friend once tried skipping the cooling step and ended up with a chocolate crust that was too hard to bite through—lesson learned the hard way.
The 5-Minute Rest That Changes Everything
After the final refrigeration step, let the cups rest at room temperature for exactly five minutes. This brief pause allows the chocolate to set just enough for a snap but still remain supple. Skipping this step can result in cups that feel too soft or too brittle. Trust me, that five-minute rest is the secret to a perfectly balanced bite.
The Secret of Silky Chocolate
Use 70% dark chocolate for a richer flavor and smoother texture. The higher cocoa content melts more evenly, giving a glossy finish without the sweetness that can overpower the peanut butter. If you prefer a milk chocolate version, choose a brand with a high butterfat content to keep the melt consistent.
The Quick Cooling Trick
If you’re in a rush, place the filled cups on a wire rack over a baking sheet and put them in the freezer for 5 minutes. This quick chill sets the chocolate faster than the fridge, saving precious minutes. Just be careful not to let them freeze solid; a quick pop in the fridge after is enough.
Creative Twists and Variations
This recipe is a playground. Here are some of my favorite ways to switch things up:
Nutty Twist
Swap the peanut butter for almond or cashew butter to create a different nutty profile. The texture remains similar, but the flavor shifts toward a milder, sweeter note. This version pairs wonderfully with a splash of orange zest for a citrusy kick.
Citrus Burst
Add a teaspoon of lemon zest to the peanut butter mixture for a bright, zesty contrast. The citrus brightens the chocolate and peanut butter, creating a fresh, uplifting flavor. The result is a snack that feels lighter yet still indulgent.
Spice It Up
Introduce a pinch of cayenne pepper or smoked paprika into the peanut butter blend. The heat and smoky undertones add depth and a surprising twist. This variation is perfect for those who love a little spice with their sweets.
Caramel Swirl
Drizzle a thin stream of caramel sauce over the top of each cup before the chocolate sets. The caramel adds a buttery sweetness that complements the peanut butter and chocolate. It also gives a beautiful visual swirl that’s sure to impress.
Vegan Version
Use a plant‑based peanut butter and a dairy‑free chocolate bar. This keeps the recipe fully vegan while maintaining the same mouth‑watering texture. The flavor is just as rich, and the chocolate melts beautifully.
Miniature Treats
Make the cups smaller by using a mini muffin tin or even a silicone cupcake liner. These bite‑sized treats are perfect for parties or for a quick on‑the‑go snack. The smaller size also allows for more chocolate coverage per bite.
Storing and Bringing It Back to Life
Fridge Storage
Place the finished cups in an airtight container and keep them in the refrigerator for up to 7 days. The cold temperature keeps the chocolate firm and the peanut butter from softening too quickly. When ready to serve, let them sit at room temperature for 5 minutes to soften slightly.
Freezer Friendly
Wrap each cup individually in parchment paper before placing them in a freezer bag. They can be stored for up to 3 months without compromising texture. When you’re ready to enjoy, thaw in the fridge overnight and give them a quick 10‑second microwave pulse to revive the chocolate.
Best Reheating Method
To restore the chocolate’s glossy sheen, microwave each cup for 5–10 seconds on a low setting. If you prefer a more even heat, place the cups on a parchment‑lined tray and warm them in a preheated oven at 300°F for 3–4 minutes. A splash of water before reheating can help steam the chocolate back to a silky finish.