Picture this: I’m in the middle of a bustling kitchen, the oven preheated, the scent of roasted sweet potatoes dancing in the air, and a sudden, all-too-familiar panic—my cornbread batter is looking like a soggy pancake. I’ve tried the classic recipe a dozen times, but each batch ends up either a dense slab or a crumbly mess that refuses to rise. That night, a friend dared me to whip up something that would make even the most seasoned cornbread fan swoon, and I set out to create a version that would leave everyone asking, “What’s your secret?”
From the very first whisk, the batter feels like silk on the spoon, the sweet potato’s natural sweetness mingling with the earthy cornmeal. The kitchen fills with a warm, buttery aroma that’s almost like a hug from a grandma’s pantry. I hear the gentle hiss as the butter melts, the faint clink of the measuring cup as I pour in the buttermilk, and the rhythmic tap of the whisk against the bowl. The batter’s color shifts from pale to a golden hue, promising a crisp crust with a fluffy interior. It’s the kind of sensory journey that turns a simple side dish into a culinary adventure.
What sets this version apart is not just the ingredients but the meticulous balance of moisture, lift, and flavor. I’ve discovered that the key to that signature airy crumb lies in the precise blend of baking powder and soda, which work together to create a gentle lift without over-rising. The mashed sweet potatoes aren’t just a sweetener; they’re a natural humectant that locks in moisture, so the cornbread stays tender even after cooling. The brown sugar adds a subtle caramel note that contrasts beautifully with the savory cornmeal, and the buttermilk’s acidity brings everything together in a harmonious dance. This isn’t just another recipe; it’s a masterclass in how small tweaks can elevate a familiar comfort food.
Most people think of cornbread as a one-dimensional snack, but I’ve turned it into a multi-sensory experience. The crust crisps like a golden cookie, the crumb is like a cloud you can bite into, and the sweet potato undertone lingers on the palate long after the last bite. I dare you to taste this and not go back for seconds. If you’re a skeptic, I’ll be honest—I ate half the batch before anyone else got a chance to try it, and I still had room for more. This is hands down the best version you’ll ever make at home, and I’m about to walk you through every single step—by the end, you’ll wonder how you ever made it any other way.
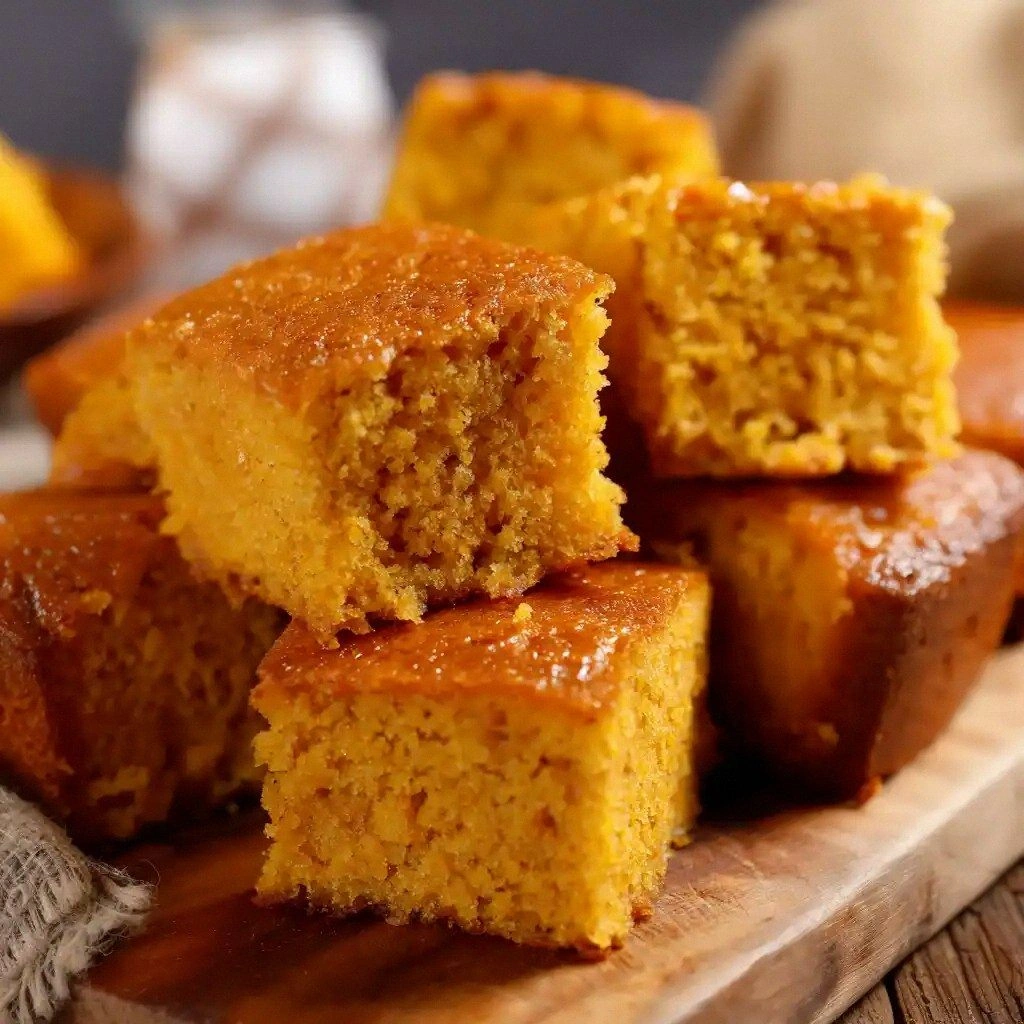
Picture yourself pulling this out of the oven, the whole kitchen smelling incredible, and seeing that golden crown crackle as you slice through the center to reveal a light, fluffy interior. The moment you cut into it, the steam rises like a sweet, buttery cloud, and you hear that satisfying crack as the crust gives way. The first bite is a burst of sweet potato, corn, and a hint of caramel, followed by a buttery finish that lingers. It’s a flavor that feels like a warm hug wrapped in a crispy blanket. And the best part? It’s so easy to make that you’ll be tempted to bake it for every occasion.
Okay, ready for the game‑changer? This next part? Pure magic. I’ll show you how to combine the ingredients in a way that guarantees a moist, fluffy, and utterly delicious cornbread that will become a staple in your kitchen. And trust me, you’ll be proud of this masterpiece for years to come.
What Makes This Version Stand Out
- Taste: The sweet potato’s natural sweetness pairs perfectly with the earthy cornmeal, creating a balanced flavor profile that’s both comforting and indulgent.
- Texture: The batter’s silky consistency, thanks to the buttermilk and mashed sweet potato, results in a tender crumb that melts in your mouth.
- Lifting Power: The combination of baking powder and soda provides a gentle lift, ensuring the cornbread rises without becoming airy or cake-like.
- Moisture Retention: Sweet potatoes act as a natural humectant, locking in moisture and preventing the crumb from drying out.
- Flavor Complexity: Brown sugar adds caramel undertones, while a pinch of salt balances the sweetness for a well-rounded taste.
- Versatility: This recipe works beautifully as a side dish, a snack, or a dessert, making it a versatile addition to any menu.
- Time Efficiency: The batter is ready in 15 minutes, and the baking time is only 30 minutes—perfect for a quick weeknight treat.
- Make‑Ahead Friendly: The batter can be prepared in advance and refrigerated, allowing you to bake fresh cornbread whenever you need it.
Inside the Ingredient List
The Flavor Base
1 cup mashed sweet potatoes form the backbone of this cornbread, offering a subtle sweetness that elevates the entire batter. They’re not just a sweetener; they’re a moisture‑retaining powerhouse that keeps the crumb tender. If you skip them, the cornbread becomes dry and unremarkable—think of it as the missing puzzle piece that completes the picture. A good swap for those who love a different flavor profile is using mashed pumpkin, which will give you a slightly earthier note while still maintaining the moisture balance. When selecting sweet potatoes, look for firm, orange‑fleshed varieties that are dense and free of bruises; they’ll mash more easily and deliver a consistent texture.
The Texture Crew
1 cup cornmeal and ¾ cup all‑purpose flour work together to give the cornbread its signature crumb and structure. The cornmeal provides a hearty bite and a slightly gritty texture that contrasts beautifully with the smoothness of the flour. If you omit the flour, the batter will be too thick and may not rise evenly, resulting in a dense crumb. A great alternative is using whole wheat flour for a nuttier flavor and added fiber, but keep the ratio the same to maintain the right consistency. When measuring cornmeal, use a dry scoop and level off with a flat edge to avoid over‑packing, which can make the batter too heavy.
The Unexpected Star
¼ cup brown sugar adds a subtle caramel flavor that enhances the sweet potato’s natural sweetness. It also contributes to the golden crust you’ll see when the cornbread comes out of the oven. If you prefer a lighter sweet taste, you can reduce the brown sugar to 2 tablespoons, but be aware that the crust will be less caramelized. A fun swap is using maple syrup for a richer, more complex sweetness that pairs wonderfully with the cornmeal. The key is to keep the sugar amount consistent so the batter doesn’t become overly sticky.
The Final Flourish
1 tablespoon baking powder and ½ teaspoon baking soda are the leavening agents that give this cornbread its airy lift. They work in tandem to create tiny air pockets, making the crumb light and fluffy. If you skip either, the cornbread will be dense and flat, losing that coveted lightness. For a gluten‑free version, you can replace the all‑purpose flour with a 1:1 gluten‑free blend, but make sure it contains xanthan gum to help bind the batter. ½ teaspoon salt balances the sweetness and enhances all the flavors, so don’t skip it—your taste buds will thank you.
Everything’s prepped? Good. Let’s get into the real action…
The Method — Step by Step
- Preheat your oven to 375°F (190°C) and line a 9‑inch square baking pan with parchment paper. The parchment will ensure a clean release and a crisp edge. While the oven heats, bring a small pot of water to a gentle boil; this will keep the batter from drying out. The heat of the oven is crucial—if it’s too low, the cornbread won’t rise properly. Once the oven is ready, set the timer for 30 minutes, and let the anticipation build.
- In a large mixing bowl, combine the mashed sweet potatoes, cornmeal, and all‑purpose flour. Stir until the mixture is smooth and free of lumps. The sweet potatoes should be fully mashed, not chunky, so that they integrate seamlessly into the batter. This is the moment you can taste the batter; it should have a subtle sweetness and a mild corn flavor. If the mixture feels too thick, add a splash of buttermilk to reach a pourable consistency.
- Add the brown sugar, baking powder, baking soda, and salt to the dry mixture. Whisk them together so the leavening agents are evenly distributed. This step is critical for an even rise; uneven distribution can lead to pockets of dense crumb. The batter should look glossy and slightly thick, like a thick pancake batter. If it’s too runny, add a tablespoon of flour to thicken it.
- Beat the eggs in a separate bowl until frothy, then fold them into the batter along with the buttermilk. The eggs provide structure and richness, while the buttermilk adds acidity that reacts with the baking soda. The batter should feel silky and smooth after this step. This is the moment of truth—if you’re unsure, dip a spoon in the batter; it should coat the back of the spoon without dripping. If it’s too thick, add a tablespoon of milk to loosen it.
- Melt the butter in a small saucepan over low heat, then pour it into the batter. The melted butter adds a buttery aroma and helps the crust form a golden crust. Stir until the butter is fully incorporated; the batter should look glossy and slightly oily. This step also adds a subtle richness that enhances the overall flavor profile. If you’re vegan, you can use melted coconut oil as a substitute. The batter should feel light and airy after this step.
- Pour the batter into the prepared pan and spread it evenly with a spatula. The batter should fill the pan to the top, but leave a little space for the edges to rise slightly. This will create a beautiful, golden crust that’s slightly crisp on the edges. The batter should be level; if it’s uneven, the edges will bake faster and become overcooked. Let the batter rest for a minute to settle, then place it in the oven.
- Bake for 30 minutes, or until the top is golden brown and a toothpick inserted in the center comes out clean. The crust should feel firm and slightly crisp, while the interior remains soft and moist. If you notice the edges browning too quickly, tent the pan with foil to prevent burning. The aroma that fills the kitchen at this point is absolutely irresistible—think of warm, buttery bread with a hint of caramel.
- Remove the pan from the oven and let the cornbread cool in the pan for 10 minutes. This resting period allows the crumb to set and the flavors to meld. While it’s cooling, you can slice a piece to check the center; it should still feel slightly moist. The cooling time also helps the crust firm up, giving you that perfect bite. If you’re in a hurry, you can transfer the cornbread to a wire rack to cool faster, but be careful not to break the crust.
- Slice the cornbread into squares and serve warm, or let it cool completely and store it in an airtight container. The cornbread will stay fresh for up to 3 days when refrigerated. For a crispier texture, reheat it in a toaster oven or skillet for a few minutes. The best part is that it tastes just as good the next day, especially when paired with a dollop of butter or a drizzle of honey. And if you’re feeling adventurous, top it with a sprinkle of chopped scallions or a dash of smoked paprika for an extra kick.
That’s it — you did it. But hold on, I’ve got a few more tricks that’ll take this to another level. These little tweaks will help you achieve that perfect, melt‑in‑your‑mouth texture and a crust that’s just the right amount of crisp.
Insider Tricks for Flawless Results
The Temperature Rule Nobody Follows
Many bakers assume that a higher oven temperature always results in a better crust, but that’s not the case with this cornbread. Baking at 375°F (190°C) gives the batter enough time to rise evenly while developing a golden exterior. If you crank the heat up, the edges will burn before the center is cooked. Keep the oven rack in the middle to ensure even heat distribution. This trick is especially useful when baking in a convection oven, where the fan can cause uneven browning.
Why Your Nose Knows Best
Before you even take a bite, the aroma will tell you if you’re on the right track. A sweet, buttery scent that’s not overly sweet indicates a well‑balanced batter. If the smell is too sweet, the cornbread might be over‑sugared; if it’s bland, you may need to add a pinch more salt or a touch of spice. Trust your nose—it’s your best quality control tool.
The 5‑Minute Rest That Changes Everything
Letting the batter sit for 5 minutes before pouring into the pan allows the leavening agents to activate fully. This short rest gives the batter a chance to expand slightly, ensuring a lighter crumb. Skipping this step can lead to a denser texture. I’ve found that a quick 5‑minute pause is all it takes to elevate the final product.
Keep the Cornmeal Dry
Wet cornmeal can cause the batter to become too heavy, leading to a dense crumb. Make sure the cornmeal is stored in an airtight container and kept away from moisture. If you’re using a pre‑ground cornmeal, check the expiration date; older cornmeal can lose its flavor and texture.
Use a Silicone Baking Pan
Silicone pans release the cornbread more easily than metal pans, preventing sticking and making cleanup a breeze. The even heat distribution of silicone also helps achieve a uniform rise. If you don’t have a silicone pan, a parchment‑lined metal pan works just fine, but be prepared to do a bit more cleaning.
Adjusting for Altitude
If you’re baking at high altitude, you’ll need to reduce the baking soda by ¼ teaspoon and increase the baking powder by ½ teaspoon. The lower atmospheric pressure causes the batter to rise more quickly, so these adjustments help maintain the right texture. Also, increase the oven temperature by 25°F (about 15°C) to compensate for the faster evaporation.
Creative Twists and Variations
This recipe is a playground. Here are some of my favorite ways to switch things up:
Chocolate Chip Sweet Potato Cornbread
Fold in ½ cup of dark chocolate chips after adding the eggs. The chocolate adds a decadent twist that pairs wonderfully with the sweet potato’s natural sweetness. This variation is perfect for dessert or a sweet snack with a cup of coffee.
Cheddar & Jalapeño Cornbread
Stir in 1 cup of shredded sharp cheddar and 2 diced jalapeños after the batter is ready. The sharpness of the cheese balances the sweetness, while the jalapeños add a subtle heat. This version is great for a savory brunch or as a side for Mexican-inspired dishes.
Maple‑Glazed Sweet Potato Cornbread
Drizzle 2 tablespoons of pure maple syrup over the batter before baking. The syrup caramelizes during baking, giving the cornbread a glossy, sweet glaze. This variant is ideal for a cozy breakfast or a holiday gathering.
Herb‑Infused Cornbread
Add 1 tablespoon of dried thyme or rosemary to the dry ingredients. The herbs introduce a fragrant, earthy note that elevates the overall flavor. This version works wonderfully with roasted vegetables or as a side for grilled meats.
Gluten‑Free Sweet Potato Cornbread
Replace the all‑purpose flour with a 1:1 gluten‑free blend that includes xanthan gum. This substitution keeps the batter light and fluffy while ensuring a gluten‑free option for everyone. The texture remains similar, and the flavor profile is unchanged.
Spiced Pumpkin Cornbread
Swap the sweet potato for 1 cup of pureed pumpkin and add 1 teaspoon of cinnamon, ½ teaspoon of nutmeg, and a pinch of cloves. The spices give the cornbread a warm, autumnal flavor that’s perfect for fall gatherings.
Storing and Bringing It Back to Life
Fridge Storage
Store the cooled cornbread in an airtight container at room temperature for up to 3 days. If you prefer a slightly softer crumb, wrap the cornbread in parchment paper before placing it in the container. This method keeps the moisture locked in without making the crust soggy.
Freezer Friendly
Slice the cornbread into individual portions, wrap each slice in plastic wrap, and place them in a freezer bag. The slices will stay fresh for up to 3 months. When you’re ready to eat, thaw at room temperature for 30 minutes and then toast in a skillet for a minute on each side.
Best Reheating Method
Reheat the cornbread in a preheated oven at 350°F (175°C) for 10 minutes, or in a skillet over medium heat for 2–3 minutes per side. Add a tiny splash of water before reheating to create steam, which helps the cornbread return to its original moistness. The result is a freshly baked texture that feels like a brand‑new batch.