I was mid‑midnight, the kitchen lights humming like a low‑key disco, and my roommate dared me to create a dessert that wouldn’t make the scale scream. I stared at a half‑empty tub of Greek yogurt, a jar of cashew butter, and a lonely scoop of protein powder, and thought, “What if I could turn these pantry basics into something that feels like a cheat‑day indulgence but actually fuels the body?” The first bite I scooped onto a parchment square was a revelation: creamy, tangy, and just sweet enough to make my taste buds do a happy dance. That moment was the spark that ignited this recipe, and I’ve been perfecting it ever since, adding a few secret tricks that most recipes completely miss.
Picture this: the cool, velvety scent of yogurt mingling with the deep, earthy aroma of cacao nibs, the faint buttery whisper of cashew oil, and a whisper of vanilla that makes the whole kitchen feel like a boutique ice‑cream parlor. You hear the faint clink of the metal spoon as you stir, feel the silk‑smooth texture sliding across the sides of the bowl, and taste that first spoonful—like a frozen cloud that melts into a protein‑packed hug. It’s a sensory overload that’s both comforting and exhilarating, and the best part? No guilt, no heavy after‑taste, just pure, clean satisfaction.
Most frozen yogurt bites out there either turn into icy bricks or watery slushes, and the texture is usually the first thing that lets you down. This version stands out because the combination of Greek (or coconut) yogurt with a dab of nut butter creates a custard‑like body that stays creamy even after a solid freeze. The maple syrup adds just enough natural sweetness without the processed sugar overload, while the protein powder gives it a subtle, satisfying bite that makes you feel like you’ve just completed a workout. And let’s not forget the chocolate chips and cacao nibs that add a crunch that shatters like thin ice when you bite into them.
Okay, ready for the game‑changer? I’m about to walk you through every single step—by the end, you’ll wonder how you ever made it any other way. I dare you to taste this and not go back for seconds. Let’s dive in.
What Makes This Version Stand Out
- Texture: The nut butter emulsifies the yogurt, preventing icy crystals and delivering a melt‑in‑your‑mouth creaminess that rivals premium gelato.
- Flavor Depth: Maple syrup adds a caramel‑like nuance while the vanilla extract lifts the whole profile, making each bite feel layered.
- Protein Punch: One scoop of protein powder turns a simple snack into a post‑workout recovery treat without any chalky aftertaste.
- Simplicity: Only nine ingredients, all pantry‑friendly, and no fancy equipment—just a bowl, a freezer tray, and a spoon.
- Crunch Factor: Cacao nibs and chocolate chips create a textural contrast that’s as satisfying as biting into a chocolate‑covered almond.
- Customizable: Swap Greek for coconut yogurt, cashew for almond butter, or maple for honey—this recipe bends to your dietary needs.
- Make‑Ahead Magic: Freeze them in bulk, store in an airtight container, and you’ve got a ready‑to‑go snack for weeks.
- Crowd Reaction: Even the most skeptical sweet‑tooth will admit these bites are “the best version you’ll ever make at home.”
Inside the Ingredient List
The Flavor Base
Greek yogurt or coconut yogurt is the foundation of this recipe. Greek yogurt brings a tangy richness and a high protein content, while coconut yogurt offers a dairy‑free, tropical twist that pairs beautifully with the nut butter. Skipping this step and using regular milk would make the mixture too runny and strip away that luxurious mouthfeel. If you’re vegan, opt for a thick, plain coconut yogurt that’s unsweetened to keep the balance just right.
The Texture Crew
Cashew butter or almond butter is the secret liaison that binds everything together. Its natural fats coat the yogurt particles, preventing ice crystal formation during freezing. Using a lower‑fat spread would result in a grainy texture that feels more like a sorbet than a creamy bite. When selecting your nut butter, choose a brand with no added sugars or oils; a simple, single‑ingredient spread yields the cleanest flavor.
The Sweetener & Boost
Maple syrup adds a nuanced sweetness that sugar can’t match, while also contributing a subtle caramel note that deepens the overall profile. Two tablespoons is enough to sweeten without overwhelming the tang of the yogurt. The protein powder—any unflavored or vanilla whey or plant‑based option—injects a subtle body and makes these bites a post‑workout hero. If you skip the protein powder, you’ll lose that satisfying “bite” and the nutritional edge.
The Unexpected Star
Cacao nibs are the unsung heroes that bring a bitter crunch, balancing the sweet maple and creamy base. They’re essentially raw chocolate chunks that don’t melt, so they stay crunchy even after the freeze. If you can’t find nibs, you can substitute crushed espresso beans for a coffee‑kissed twist, but the texture will be slightly softer.
The Final Flourish
Chocolate chips or chopped chocolate melt just enough during the final freeze to create a glossy coating that hardens into a delicate shell. Pairing them with coconut oil ensures a smooth, glossy finish and prevents the chocolate from becoming grainy. If you’re dairy‑free, choose dark chocolate with at least 70% cocoa and a coconut‑oil base.
Everything's prepped? Good. Let’s get into the real action…
The Method — Step by Step
In a large mixing bowl, whisk together the Greek (or coconut) yogurt and the cashew (or almond) butter until the mixture is silky smooth. This should take about two minutes of vigorous stirring; you’ll notice the mixture turning a richer, slightly whiter hue as the fats emulsify with the dairy. Tip: Scrape the sides of the bowl frequently to ensure an even blend. Power transition: This is the moment where the base becomes a canvas for all the flavor layers.
Add the maple syrup, vanilla extract, and a pinch of sea salt to the bowl. The salt is the unsung hero that amplifies the sweetness and rounds out the flavor. Stir until fully incorporated; you should smell a warm, caramel‑vanilla perfume rising from the mixture. Watch out: Over‑mixing can introduce too much air, which later leads to icy pockets.
Sprinkle in the protein powder and fold gently. The mixture may look a little lumpy at first, but keep folding until the powder disappears and the texture returns to a smooth consistency. If you notice any stubborn lumps, use a small whisk to break them up. Future pacing: Imagine the protein‑packed bite you’ll feel after a workout—this is that moment.
Gently fold in the cacao nibs, reserving a tablespoon for topping later. The nibs should be evenly distributed, creating specks of dark chocolate throughout the creamy base. This step adds that “crunch that shatters like thin ice” sensation we all love. Watch out: Adding too many nibs can overwhelm the delicate balance; stick to the recommended half‑cup.
Line a baking sheet with parchment paper or a silicone mat. Using a small ice‑cream scoop, portion the mixture into bite‑size rounds—about one inch in diameter. Place them on the sheet, leaving a tiny gap between each for expansion. Power transition: And now the fun part—getting them ready for the freezer.
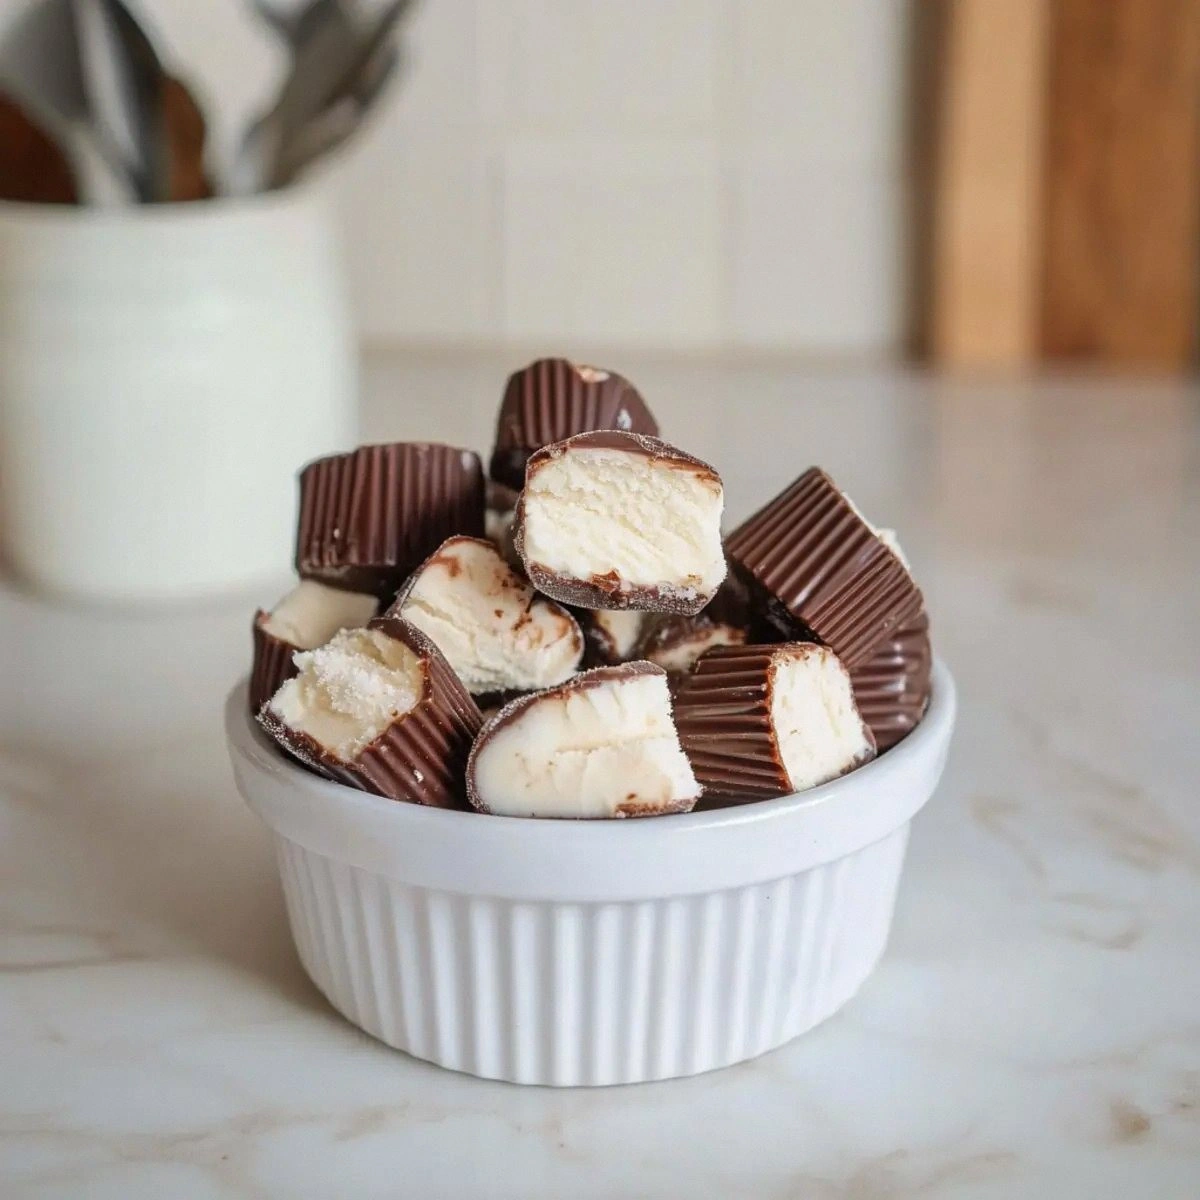
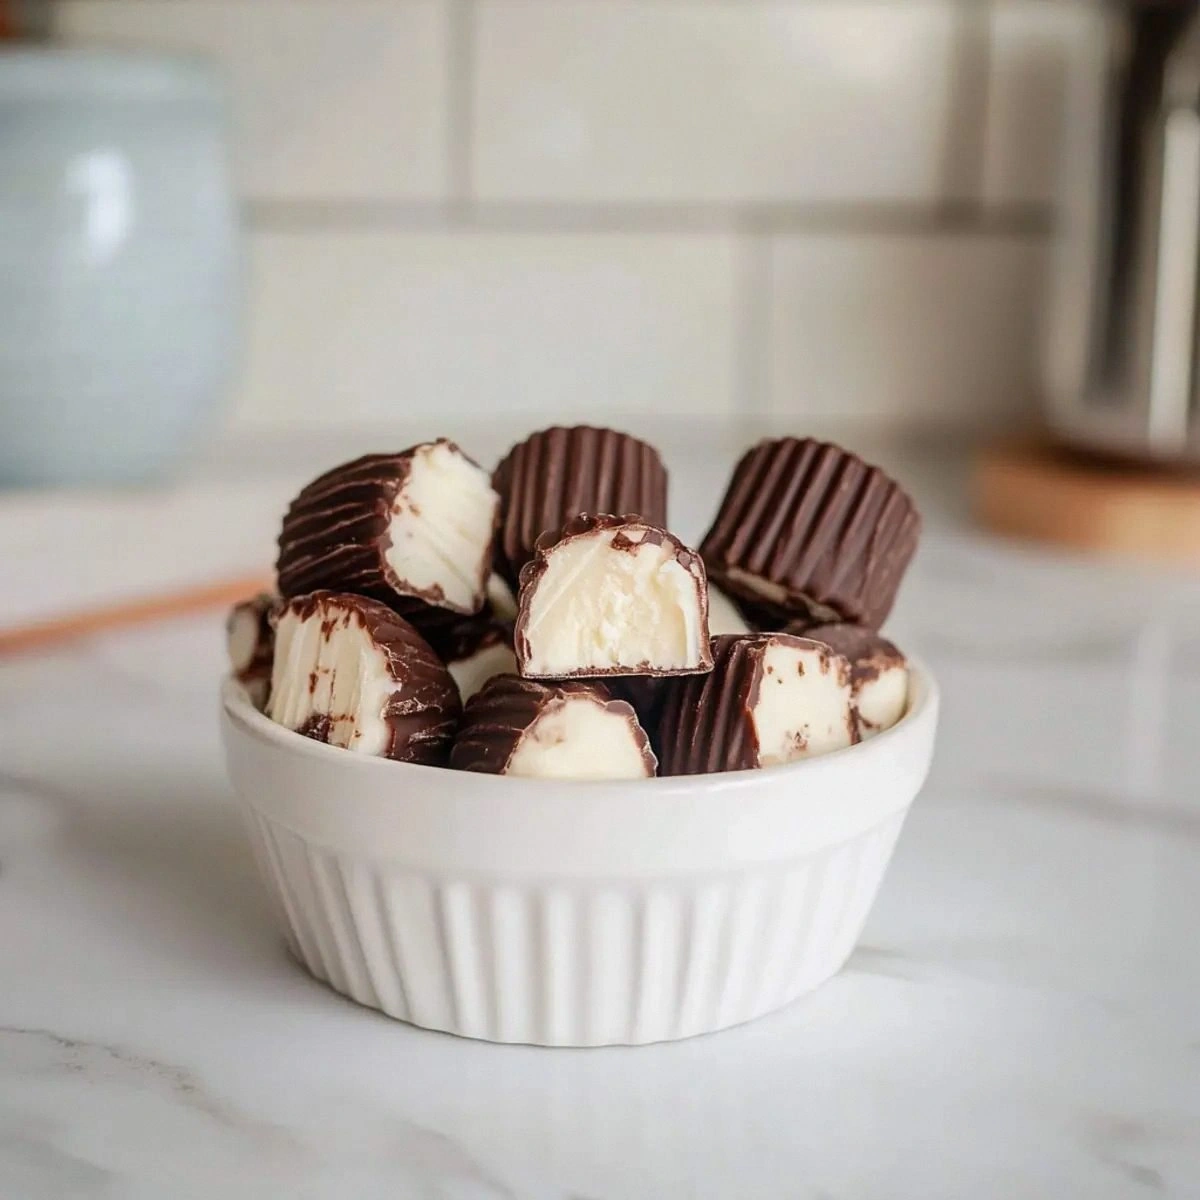
Melt the chocolate chips with the coconut oil in a microwave‑safe bowl, heating in 20‑second bursts and stirring in between until fully smooth. The mixture should be glossy and fluid, not bubbling. Once melted, dip each frozen yogurt bite halfway into the chocolate, allowing excess to drip back into the bowl. The chocolate will set quickly, forming a thin, crisp shell.
Transfer the chocolate‑coated bites back onto the parchment and sprinkle the reserved cacao nibs on top while the chocolate is still soft. This ensures the nibs adhere firmly. Place the tray in the freezer for at least 30 minutes, or until the chocolate is fully set and the interior is firm to the touch.
Once set, pop the bites off the parchment and store them in an airtight container. They’ll keep for up to two weeks in the freezer, and you can pull a handful whenever you need a guilt‑free pick‑me‑up. Confession: I ate half the batch before anyone else got a chance—don’t judge.
That's it — you did it. But hold on, I've got a few more tricks that'll take this to another level…
Insider Tricks for Flawless Results
The Temperature Rule Nobody Follows
Keep your yogurt and nut butter chilled before mixing. When both components are cold, the emulsion stays tighter, which means fewer ice crystals form during the freeze. I once tried this at room temperature and ended up with a gritty texture that felt more like a sorbet than a creamy bite. The rule of thumb: if the bowl feels warm to the touch, pop it in the fridge for five minutes before proceeding.
Why Your Nose Knows Best
Before you pour the chocolate, give it a quick sniff. If you can smell a faint burnt scent, the chocolate is overheating and will become grainy. The moment the chocolate smells rich and buttery, it’s ready. Trust that nose—it’s the most reliable thermometer you have in a busy kitchen.
The 5‑Minute Rest That Changes Everything
After you blend the yogurt mixture, let it sit uncovered for exactly five minutes. This brief rest allows any trapped air to rise to the surface and escape, resulting in a denser, smoother bite after freezing. Skipping this step is a common mistake that leads to a spongy mouthfeel, as the air pockets expand when frozen.
The Double‑Dip Technique
For an extra chocolate crunch, dip each bite twice: first, a quick half‑dip, freeze for two minutes, then dip again for a full coating. The second dip creates a thicker shell that cracks satisfyingly when you bite. A friend tried this once and ended up with a bite that sounded like a tiny fireworks show in his mouth—pure joy.
The Secret Salt Sprinkle
A pinch of flaky sea salt on the final chocolate coating elevates the flavor dramatically. The salt contrasts with the sweet chocolate and highlights the tang of the yogurt, creating a balanced flavor profile that feels sophisticated.
Creative Twists and Variations
This recipe is a playground. Here are some of my favorite ways to switch things up:
Berry Burst
Swap half of the chocolate chips for freeze‑dried raspberry pieces and add a teaspoon of raspberry puree to the yogurt base. The tart berries cut through the richness, making these bites perfect for summer picnics.
Matcha Magic
Blend a tablespoon of matcha powder into the yogurt mixture and replace the chocolate chips with white chocolate shards. The earthy green tea flavor pairs beautifully with the nut butter, delivering a subtle caffeine kick.
Spicy Chili
Add a pinch of cayenne pepper and a drizzle of dark chocolate infused with chipotle. The heat awakens the palate and turns the bite into a daring dessert for adventurous eaters.
Nutty Crunch
Replace cacao nibs with toasted chopped pistachios and use almond butter instead of cashew. The bright green pistachios add visual flair and a buttery crunch that’s hard to resist.
Coffee Lover’s Dream
Stir in a teaspoon of instant espresso powder and swap the chocolate chips for dark chocolate espresso bits. The coffee notes amplify the chocolate, creating a mocha‑like experience in each bite.
Storing and Bringing It Back to Life
Fridge Storage
If you plan to eat the bites within 24‑48 hours, transfer them to a sealed container and keep them in the refrigerator. They’ll stay soft enough to pop out with a spoon, and the texture will remain creamy rather than hard.
Freezer Friendly
For longer storage, keep the bites in an airtight freezer‑safe bag or container, separating layers with parchment paper to prevent sticking. They’ll stay fresh for up to two weeks. When you’re ready to serve, let them sit at room temperature for three minutes; this softens the outer chocolate shell just enough for an easy bite.
Best Reheating Method
If you accidentally over‑freeze and the bites become rock‑hard, place them on a plate and drizzle a tiny splash (about a teaspoon) of water over the top, then microwave for 5‑7 seconds. The steam revives the interior without melting the chocolate, delivering that perfect melt‑in‑your‑mouth feel.