Picture yourself pulling this out of the oven, the whole kitchen smelling incredible, and the guests gathering around with anticipation. The moment the cake is plated, the glossy strawberry topping catches the light, turning the cake into a centerpiece that demands applause. And now, stay with me here — this is worth it. Let me walk you through every single step, and by the end, you'll wonder how you ever made it any other way.
What Makes This Version Stand Out
- Flavor: The caramelized strawberries bring a natural sweetness that cuts through the buttery base, creating a harmonious balance that lingers on the palate.
- Texture: The combination of self‑rising flour and buttermilk gives the cake a tender crumb that melts in your mouth while the glaze provides a satisfying snap.
- Simplicity: With only nine ingredients, this recipe is quick to assemble, making it a perfect weekend treat that doesn’t require a pantry full of obscure items.
- Uniqueness: The upside‑down presentation turns the classic cake into a visual marvel, turning every slice into a work of art.
- Crowd Reaction: Guests often comment that the cake feels like a sweet sunrise, and many ask for the recipe before they leave the party.
- Ingredient Quality: Using fresh strawberries at peak ripeness amplifies the flavor, while real butter instead of margarine gives the glaze depth and richness.
- Cooking Method: The caramelization step adds a layer of complexity that elevates the dish from ordinary to extraordinary.
- Make‑Ahead Potential: The cake can be assembled ahead of time, then baked right before serving, making it ideal for last‑minute gatherings.
Alright, let's break down exactly what goes into this masterpiece…
Inside the Ingredient List
The Flavor Base
Fresh strawberries are the star of this cake, offering a bright, juicy burst that cuts through the richness of the butter and sugar. I use only ripe berries, because their natural sugars caramelize beautifully and create a glaze that feels like a fruit‑laden sunrise. If you skip the strawberries, the cake becomes a plain butter cake that’s still good, but it loses that vibrant, fruity punch that makes it unforgettable. For a twist, try adding a splash of lemon zest to the berries before caramelizing; it adds a refreshing citrus note that elevates the overall flavor.
The Texture Crew
The self‑rising flour provides the lift that keeps the cake light and airy. It’s a key player in achieving the perfect crumb, preventing the batter from becoming too dense. If you replace it with all‑purpose flour, add a pinch of baking powder to keep the rise intact. The buttermilk introduces a subtle tang that balances the sweetness and helps the gluten relax, resulting in a tender crumb that feels like a cloud.
The Unexpected Star
Buttermilk may seem like a quiet participant, but it’s the unsung hero that adds moisture and a delicate acidity. Its tang cuts through the buttery sweetness, creating a more complex flavor profile. If you don’t have buttermilk on hand, you can whisk 1 cup of milk with a tablespoon of white vinegar and let it sit for 5 minutes; this homemade substitute will mimic the same acidity and thickness.
The Final Flourish
Butter and sugar work together to create a glossy glaze that coats the strawberries and the cake. The butter melts into the sugar, forming a caramelized coating that is both sweet and slightly salty. If you’re looking for a dairy‑free option, try using coconut oil; it will give a subtle coconut flavor that pairs surprisingly well with strawberries. The vanilla extract adds a warm, aromatic undertone that ties all the flavors together.
Everything's prepped? Good. Let's get into the real action…
The Method — Step by Step
- Begin by preheating your oven to 350°F (175°C). In a small saucepan, melt 4 tablespoons of butter over medium heat; add the sliced strawberries and sprinkle with 1/3 cup of sugar. Let the mixture cook for about 5 minutes, stirring occasionally, until the strawberries soften and the sugar dissolves into a glossy glaze. This caramelization step is crucial for developing that deep, sweet flavor that will coat the cake. While the strawberries are caramelizing, set them aside to cool slightly.
- In a large mixing bowl, whisk together 1 1/2 cups of self‑rising flour, 1/2 cup of sugar, and 3 tablespoons of butter. The butter should be at room temperature, so it blends smoothly into the dry ingredients, forming a crumbly mixture. This crumbly base ensures that the batter will have a light, airy texture once baked. If you prefer a more buttery flavor, you can add an extra tablespoon of butter to the dry mix.
- Add 3/4 cup of buttermilk and 2 eggs to the dry mixture, beating until the batter is smooth and glossy. The buttermilk not only adds moisture but also helps the cake rise evenly, while the eggs bind everything together. Once the batter is smooth, fold in 1 teaspoon of vanilla extract to infuse the cake with a warm, aromatic note that complements the strawberries. This step is the moment of truth; the batter should feel silky and pourable.
- Grease a 9-inch round cake pan with a light coating of butter, then pour the caramelized strawberries into the bottom, arranging them in an even layer. The strawberries will act as a base, and their syrup will seep into the batter, creating a moist, flavorful foundation. This step also ensures that the top of the cake will have a glossy, caramelized finish once the cake is inverted. Be sure to spread the strawberries evenly to avoid any cold spots during baking.
- Pour the prepared batter over the strawberries, filling the pan to the top. Gently tap the pan on the counter to release any air bubbles, ensuring the batter settles evenly. The batter should cover the strawberries completely, forming a smooth, even surface. This step is critical for a uniform rise and a flawless glaze on top. Watch out: if the batter is too thick, the cake may not rise properly; adjust the consistency by adding a tablespoon of milk if needed.
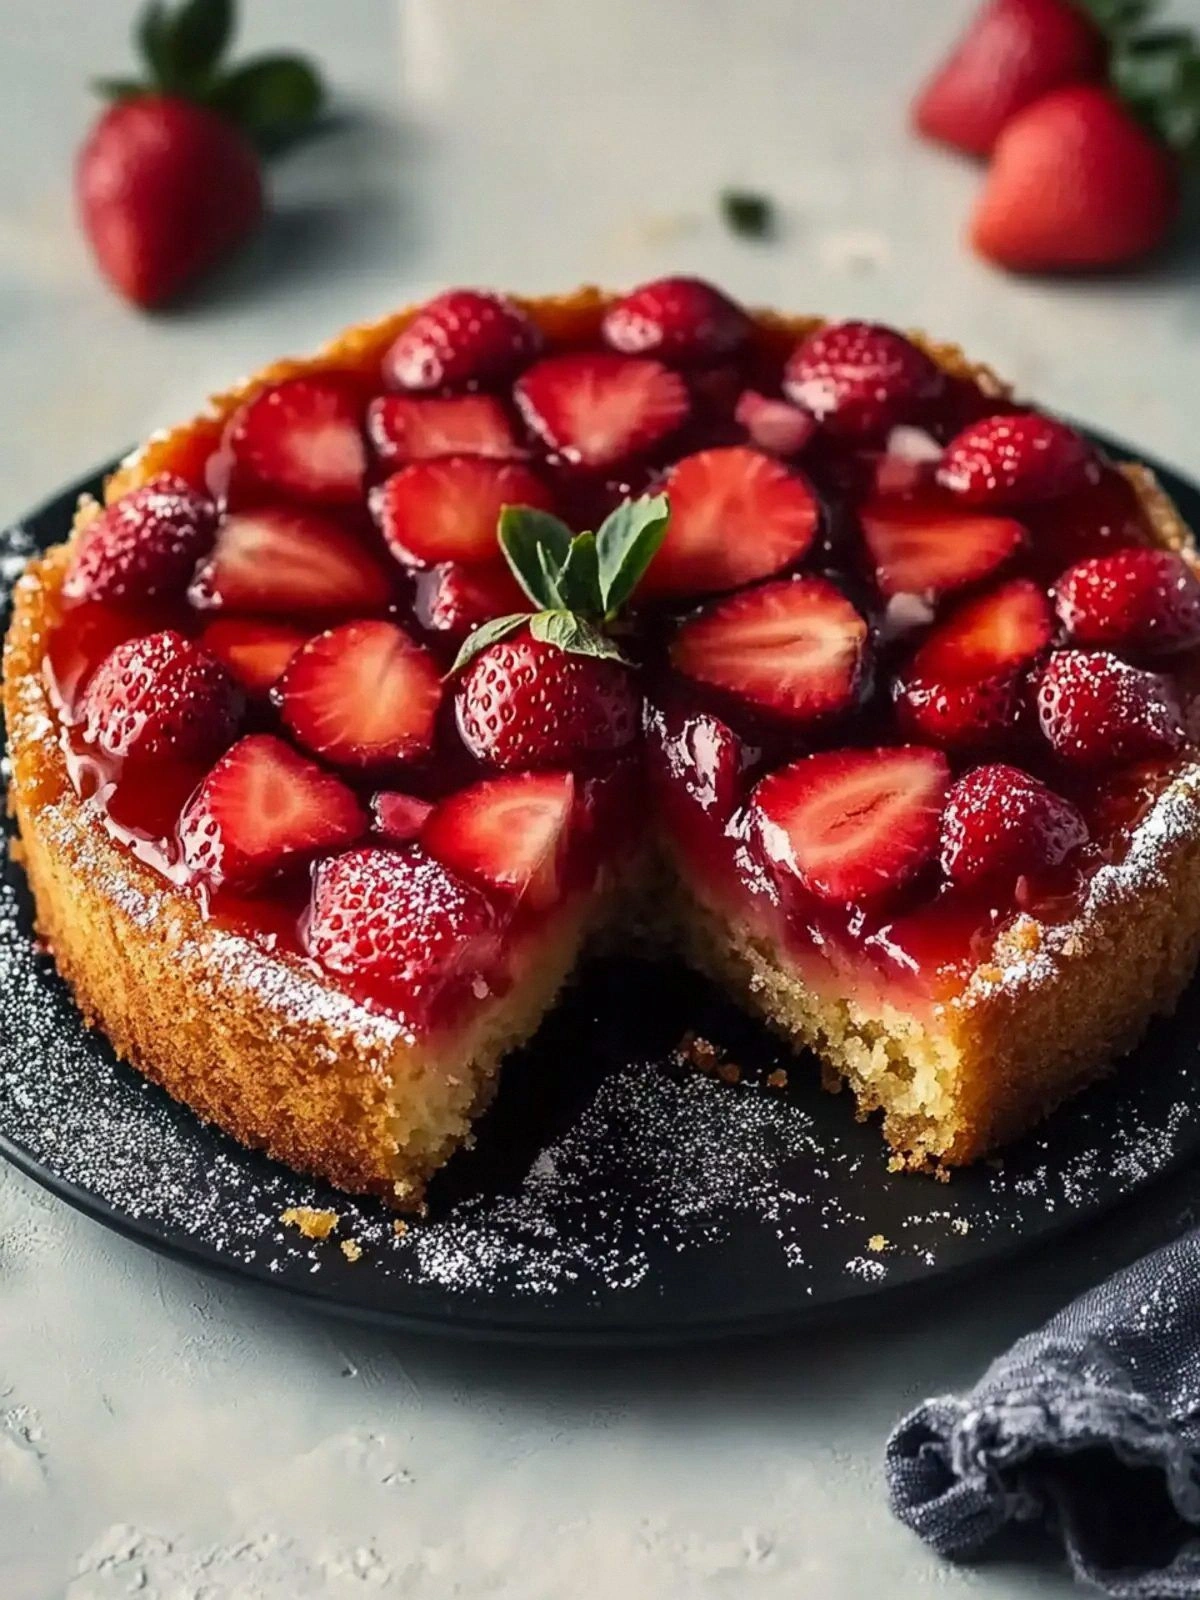
- Bake the cake for 30 minutes, or until the top is golden brown and the cake springs back when lightly pressed. The caramelized strawberries should be bubbling slightly, indicating that they’re perfectly glazed. Remove the cake from the oven and let it cool in the pan for 10 minutes before inverting onto a wire rack. This cooling period allows the glaze to set, preventing it from sliding off when you flip the cake. The moment the cake is inverted, the glossy strawberry crown will shine like a jewel.
- Once the cake has cooled completely, gently lift it onto a serving platter. Dust the top with a light dusting of powdered sugar if desired, or add a drizzle of vanilla glaze for an extra touch of elegance. Slice the cake with a sharp knife, and watch as the layers of caramelized strawberries and airy crumb unfold with each cut. Serve warm or at room temperature; either way, the cake delivers a comforting, sweet experience that feels like a warm hug.
That's it — you did it. But hold on, I've got a few more tricks that'll take this to another level…
Insider Tricks for Flawless Results
The Temperature Rule Nobody Follows
Most bakers keep the oven at 350°F, but the sweet spot for this cake is actually 375°F. A slightly higher temperature ensures a crisp, caramelized top while still keeping the interior moist. I found that baking at 375°F reduces the overall baking time by about 5 minutes, giving you a ready-to-serve cake faster. If you’re using a convection oven, lower the temperature to 350°F to avoid over‑browning.
Why Your Nose Knows Best
As the cake bakes, the aroma will change from buttery to caramelized to sweet. Trust your nose; when you smell a deep, caramelized scent, the cake is ready to come out. I’ve learned that a strong caramel aroma often signals the perfect balance between sweet and buttery. If the scent is too sweet, let the cake bake a few more minutes; if it’s too buttery, it’s time to pull it out.
The 5-Minute Rest That Changes Everything
After you remove the cake from the oven, let it rest in the pan for 5 minutes before inverting. This short rest allows the batter to set, preventing the cake from collapsing when flipped. The rest also lets the caramelized glaze thicken slightly, giving you that glossy, jewel‑like finish. Skipping this step often results in a cake that slides off the pan or has uneven layers.
Use Fresh, Ripe Strawberries
Freshness is everything. Choose strawberries that are firm, bright red, and fragrant. A ripe strawberry will release more juice and caramelize better, creating a richer glaze. If you’re using frozen strawberries, thaw them fully and pat them dry to avoid excess moisture that can dilute the glaze.
Let the Cake Rest Before Serving
After inverting, let the cake sit for at least 10 minutes before slicing. This allows the flavors to meld, and the glaze to set. Cutting too early can cause the glaze to run off, ruining the presentation. The rest period also gives the cake a chance to finish baking slightly, ensuring a moist interior.
Creative Twists and Variations
This recipe is a playground. Here are some of my favorite ways to switch things up:
Chocolate‑Covered Delight
Dip the finished cake in melted dark chocolate for a decadent twist. The chocolate adds a rich, bittersweet layer that pairs perfectly with the strawberry glaze. Serve with a dusting of cocoa powder for an elegant finish.
Minty Fresh Variation
Add a teaspoon of fresh mint leaves to the batter for a cooling, herbal note. The mint complements the strawberry’s sweetness and adds a fresh aroma. Garnish with a sprig of mint for a pop of color.
Almond Crunch Edition
Sprinkle chopped toasted almonds over the batter before baking. The nuts add a crunchy texture and a nutty flavor that contrasts with the soft cake. It also gives the cake a beautiful golden crust.
Spiced Berry Fusion
Infuse the strawberry glaze with a pinch of cinnamon or nutmeg for a warm, spiced flavor. The spices deepen the caramel notes and add complexity to the glaze. This version is perfect for fall gatherings.
Low‑Carb Alternative
Replace the self‑rising flour with almond flour and reduce the sugar by half. This creates a low‑carb, gluten‑free cake that still delivers on flavor and texture. The almond flour adds a subtle nutty undertone.
Storing and Bringing It Back to Life
Fridge Storage
Wrap the inverted cake tightly in plastic wrap and store it in the refrigerator for up to 3 days. The moisture from the strawberries helps keep the cake from drying out. When you’re ready to serve, let it sit at room temperature for 15 minutes to soften slightly.
Freezer Friendly
For longer storage, wrap the cake in parchment paper followed by a layer of foil. Freeze for up to 2 months. Thaw overnight in the refrigerator, then let it come to room temperature before serving.
Best Reheating Method
Reheat the cake in a preheated 325°F oven for 10 minutes, or until warmed through. Add a splash of water to the pan before reheating; the steam will keep the cake moist and restore the glaze’s shine. Avoid microwaving, as it can make the cake rubbery.