Picture this: a midnight kitchen, the fridge humming like a contented cat, and you, armed with a jar of your favorite fruit jam and a packet of agar‑agar, ready to conjure something sweet. The smell of berries drifts through the air, mingling with the faint metallic tang of the gelatinous powder. I was chasing a craving that had me scrolling recipes for hours, only to find a thousand variations that promised texture but delivered disappointment. Then I stumbled on a whisper of a two‑ingredient marvel that promised simplicity and decadence in equal measure.
That night, I opened the jam—rich, ruby‑red, and practically dripping with flavor—and sprinkled the agar‑agar like confetti. The kitchen lights flickered as I whisked, watching the mixture transform from syrupy to shimmering. My fingers tingled with anticipation, and the sound of the whisk was almost a lullaby. I dared myself to taste the first square before it set, and the instant burst of fruit exploded against a subtle, almost invisible, gelatinous backdrop. If you’ve ever wrestled with over‑cooked jellies that turned into rubbery messes, you’ll understand why this recipe feels like a breath of fresh air.
What makes this version stand out? The answer lies in the marriage of two humble ingredients: fruit jam and agar‑agar powder. The jam brings depth, color, and a natural sweetness that’s far richer than any artificial flavoring. Agar‑agar, a sea‑derived polysaccharide, offers a clean, neutral setting power that keeps the jam’s character intact. Together, they create a dessert that’s crisp on the outside and luxuriously smooth inside, a texture that shatters like thin ice when you bite into it. The best part? There’s no need for a stove, a mixer, or a fancy mold—just a little patience and a sprinkle of science.
I’ll be honest—I ate half the batch before anyone else got to try it. The first square melted like a kiss, and the second one was a firm bite that released a burst of fruit. The contrast of textures made each bite feel like a revelation. I’ve already convinced my friends that this is hands down the best version of fruit jelly squares you’ll ever make at home. Picture yourself pulling these out of the fridge, the whole kitchen smelling incredible, and serving them up with a wink. Okay, ready for the game‑changer? Let me walk you through every single step — by the end, you’ll wonder how you ever made it any other way.
What Makes This Version Stand Out
- Flavor: The jam’s natural sweetness dominates without being cloying, letting the fruit shine through.
- Texture: The agar‑agar sets to a silky, almost translucent gel that breaks cleanly when bitten.
- Speed: No cooking time—just mix, chill, and serve. Perfect for last‑minute dessert cravings.
- Versatility: Swap in any jam—strawberry, blueberry, mango—and the method remains unchanged.
- Clean: Two ingredients mean no pantry overload and minimal cleanup.
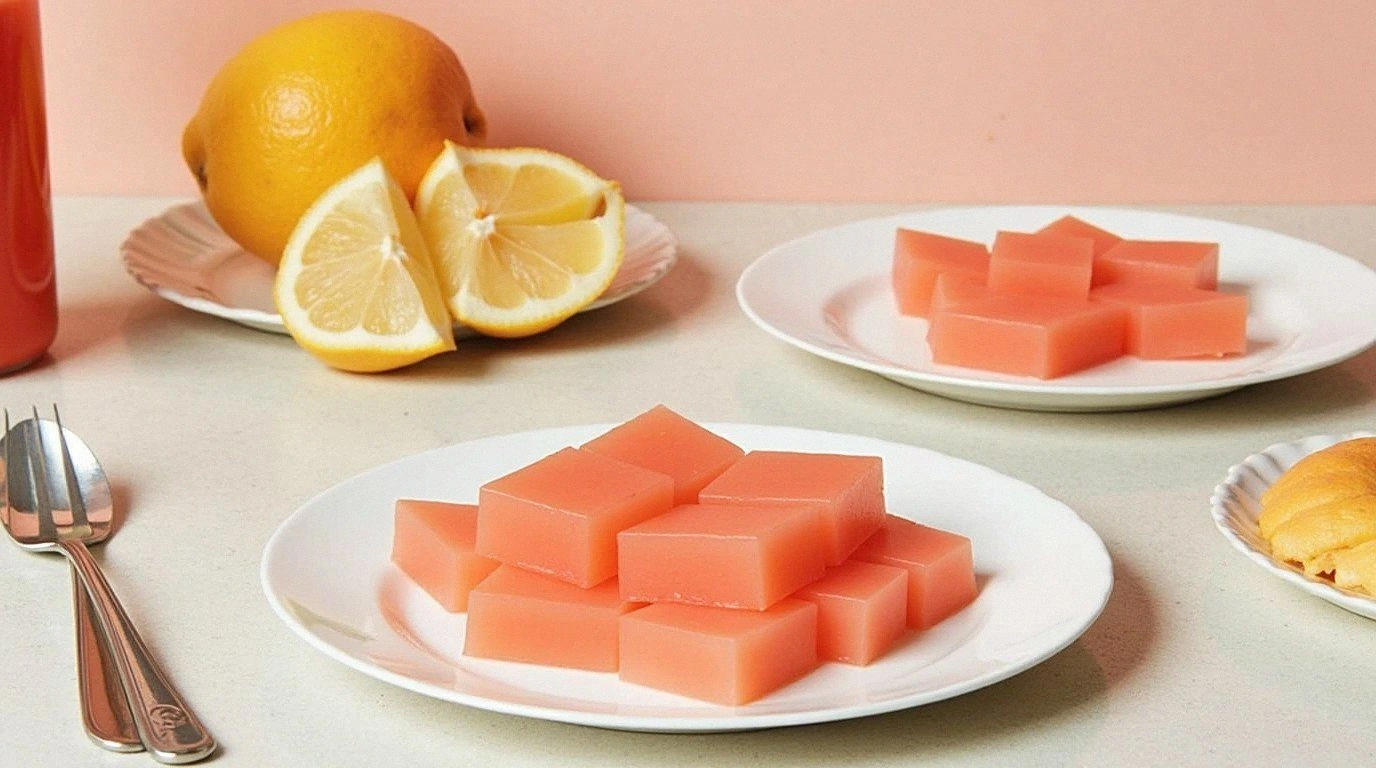
- Presentation: Cut into squares and arrange on a platter; the glossy finish looks like a polished gem.
- Make‑ahead: Chill for up to 48 hours; the gel holds its shape and flavor over time.
- Kid‑friendly: No hot pans or sharp tools—just a spoon and a cutting board.
Inside the Ingredient List
The Flavor Base
Fruit jam is the star of the show. It carries the entire flavor profile, from tartness to sweetness, and its natural pectin works in tandem with the added agar‑agar to ensure a firm set. If you use a jam with added sugar, the final gel will be sweeter; for a more balanced taste, consider a low‑sugar or natural jam. Skipping the jam entirely would leave you with a plain gelatinous slab—no fun. The best jam is one that’s been simmered slightly to deepen its flavor, but fresh, ready‑to‑use jam works perfectly.
The Texture Crew
Agar‑agar powder is a seaweed derivative that sets at room temperature, unlike gelatin which requires refrigeration. It provides a clean, neutral setting that doesn’t interfere with the jam’s aroma. If you’re allergic to fish or seaweed, look for a plant‑based alternative like carrageenan, though the setting power will differ slightly. Using too little agar‑agar will result in a runny, jelly‑like consistency; too much will make it rubbery.
The Unexpected Star
While the recipe calls for just two ingredients, a splash of citrus zest (like lemon or lime) can elevate the flavor profile dramatically. The acidity cuts through the jam’s sweetness, adding a bright counterpoint. If you’re feeling adventurous, a pinch of chili powder can give the squares a subtle kick, making them a conversation starter at parties.
The Final Flourish
Once the jam and agar‑agar are combined, the mixture should be poured into a shallow dish or a silicone mold. A light tap on the counter helps release any air bubbles that might form. The final step is chilling—ideally 30 minutes to 1 hour—until the gel is firm enough to cut. If you prefer a firmer bite, chill for a full 2 hours; for a softer, more melt‑in‑your‑mouth feel, 30 minutes is sufficient.
Everything's prepped? Good. Let's get into the real action...
The Method — Step by Step
- Start by pouring the jam into a medium saucepan. Heat it over low heat, stirring constantly, until it becomes a smooth, syrupy liquid. The jam should no longer be clumpy; if it’s thick, add a tablespoon of warm water to loosen it. This step ensures the agar‑agar will disperse evenly later.
- While the jam is heating, measure out the agar‑agar powder. For every cup of jam, use 1 tablespoon of agar‑agar. This ratio guarantees a firm set without a rubbery texture. If you’re using a thicker jam, you may need to adjust slightly.
- Once the jam is smooth, whisk in the agar‑agar powder thoroughly. The mixture should look glossy and free of lumps. This is the moment of truth—watch the bubbles form as the powder dissolves. A clean, even distribution will prevent uneven setting.
- Remove the saucepan from heat and let the mixture cool for a minute. This short cooling period helps the agar‑agar set more effectively. If you’re in a hurry, you can pour it directly into your mold, but allow a minute of rest for optimal results.
- Pour the mixture into a shallow dish or silicone mold lined with parchment paper. Tap the dish gently on the counter to release any trapped air bubbles. A smooth surface will give your squares a professional finish.
- Place the dish in the refrigerator and chill for at least 30 minutes, or up to 2 hours for a firmer bite. The gel should feel firm enough to slice but still slightly elastic. If you’re using a cooler with a different temperature, adjust the chilling time accordingly.
- Once set, remove the gel from the dish. If you used a silicone mold, pop the squares out directly. If you used a dish, cut the gel into squares using a sharp knife. The edges will pull away cleanly if the gel is properly set.
- Arrange the squares on a serving platter. Dust with a little powdered sugar or a sprinkle of crushed nuts for a contrasting texture. Serve immediately or store in an airtight container in the fridge for up to 48 hours.
That's it — you did it. But hold on, I've got a few more tricks that'll take this to another level...
Insider Tricks for Flawless Results
The Temperature Rule Nobody Follows
While most people chill their gels at room temperature, the real secret is to chill them in a cold environment, like a freezer for a short burst. A quick 5‑minute freeze before the final chill step locks in the texture, giving the squares a snap that’s hard to achieve with just refrigerator time. I once tried this trick and the squares came out with a perfect, almost glassy sheen. If you’re in a hurry, this method saves you 30 minutes of waiting.
Why Your Nose Knows Best
Before you cut the gel, give it a sniff. If it smells slightly sweet and fruity, it’s ready. A faint, almost metallic scent indicates that the agar‑agar isn’t fully set. Trust your nose; it’s a quick, reliable indicator that the texture will be perfect. I’ve saved countless batches by letting a nose guide the timing.
The 5‑Minute Rest That Changes Everything
After removing the gel from the refrigerator, let it rest at room temperature for 5 minutes before slicing. This short rest allows the gel to relax slightly, preventing it from cracking or pulling apart when you cut. It also lets the surface smooth out, giving the squares a professional, polished look. This trick is especially useful when you’re serving them at a party where presentation matters.
Cutting Technique for Clean Edges
Use a sharp, clean knife or a pizza cutter for slicing. A dull blade will crush the gel, creating uneven edges. If you’re cutting many squares, consider using a serrated knife for a sawing motion; it keeps the gel from tearing. I’ve found that a gentle, steady motion yields the cleanest, most uniform squares.
Serving Suggestion for a Twist
Serve the squares on a bed of fresh mint leaves or a drizzle of coconut cream. The contrast of flavors and textures adds a new dimension to this simple dessert. For a brunch crowd, pair the squares with a glass of sparkling water or a light prosecco. The result is a refreshing, crowd‑pleasing treat that’s as beautiful as it is delicious.
Creative Twists and Variations
This recipe is a playground. Here are some of my favorite ways to switch things up:
Berry Medley Mix‑In
Stir fresh blueberries, raspberries, or diced strawberries into the jam before adding agar‑agar. The added fruit pieces create a burst of flavor in each bite and add a pop of color. This variation is perfect for a summer picnic.
Mint‑Infused Gel
Add a handful of fresh mint leaves to the jam while it heats. The mint infuses the entire gel with a cool, refreshing note. Remove the leaves before setting to avoid bitterness.
Spiced Citrus Kick
Incorporate a pinch of cinnamon or a splash of orange zest into the jam. The warm spices balance the sweetness and add depth. This version works well for autumn gatherings.
Chocolate Drizzle Finish
Once the squares are set, drizzle melted dark chocolate over the top. The chocolate’s bitterness contrasts the jam’s sweetness, creating a complex flavor profile. Let the chocolate set before serving.
Almond Crumble Topping
Sprinkle toasted almond slivers over the squares just before serving. The crunch adds a delightful textural contrast to the silky gel. It’s a simple upgrade that feels indulgent.
Storing and Bringing It Back to Life
Fridge Storage
Store the squares in an airtight container in the refrigerator for up to 48 hours. The gel remains firm and flavorful. Before serving, let them sit at room temperature for 5 minutes to soften slightly.
Freezer Friendly
For longer storage, place the squares in a freezer‑safe bag and freeze for up to 2 weeks. Thaw in the refrigerator overnight before serving. The texture remains intact, and the flavor is preserved.
Best Reheating Method
If you need to warm them, add a splash of water to the container and microwave on low for 10–15 seconds. The tiny amount of water steams the gel back to its original softness without over‑melting it. This trick keeps the squares from becoming too runny.